Introduction
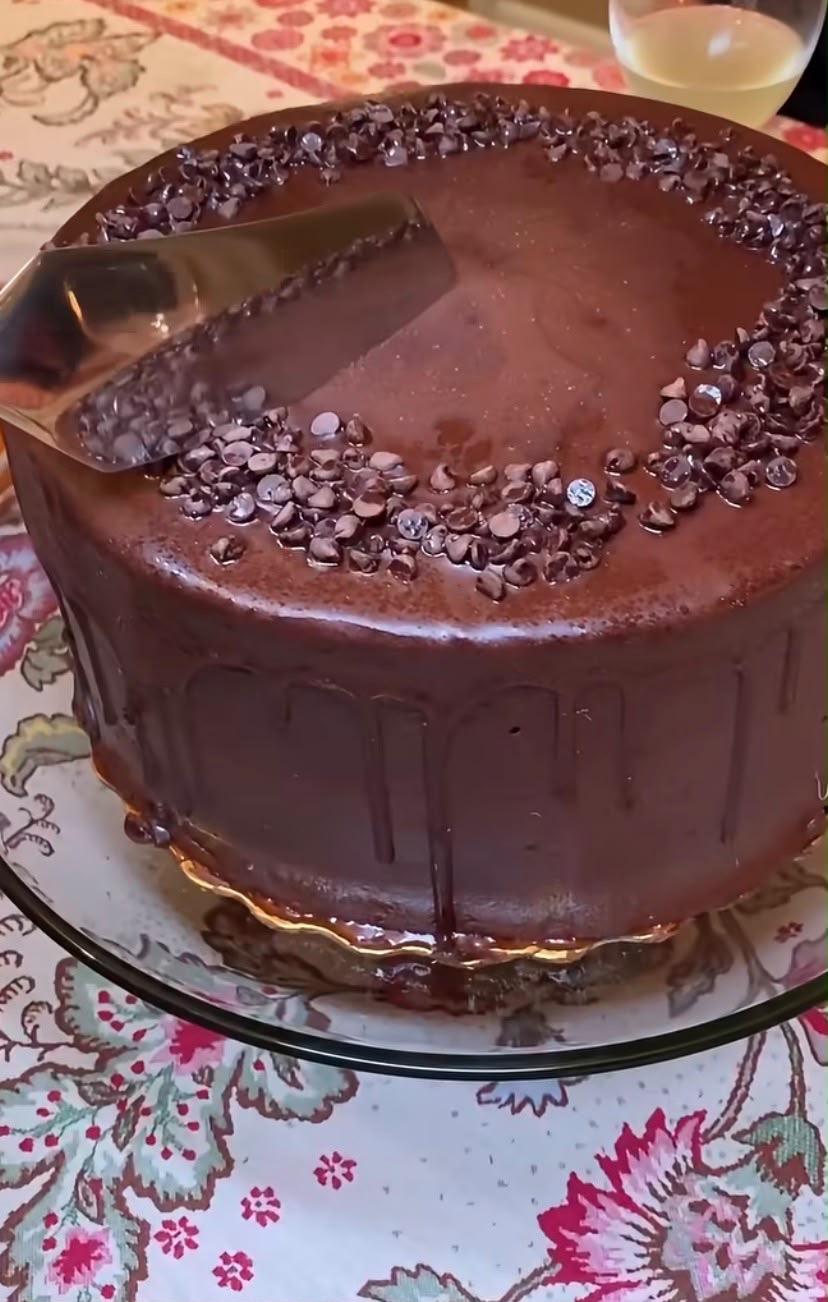
This Ultimate Decadent Chocolate Drip Cake is a rich, elegant dessert made for birthdays, celebrations, holidays, and special gatherings.
It combines moist chocolate cake layers with creamy chocolate buttercream, glossy chocolate ganache, and mini chocolate chips.
The result is a beautiful bakery-style cake with deep chocolate flavor and a soft, tender crumb.
Despite its impressive appearance, the recipe uses straightforward baking techniques and ingredients that are easy to find.
Recipe Overview
| Category | Details |
| Prep Time | 45 minutes |
| Cook Time | 30–35 minutes |
| Cooling & Decorating Time | About 40 minutes |
| Total Time | About 2 hours |
| Servings | 12 |
| Course | Dessert |
| Cuisine | International |
| Difficulty | Intermediate |
| Oven Temperature | 350°F (175°C) |
Why You’ll Love This Recipe
This chocolate drip cake delivers the rich flavor of a bakery-style celebration cake without requiring professional pastry skills.
The chocolate sponge is soft and moist, while the buttercream adds a creamy and luxurious texture.
The glossy ganache drip creates the dramatic finish that makes this cake perfect for special occasions.
Hot coffee can also be used in the batter to intensify the chocolate flavor without making the cake taste strongly of coffee.
The cake can be prepared in advance, making it convenient for birthdays and entertaining.
Ingredients
Chocolate Cake
| Ingredient | Amount |
| All-purpose flour | 2 cups |
| Granulated sugar | 2 cups |
| Unsweetened cocoa powder | ¾ cup |
| Baking powder | 2 tsp |
| Baking soda | 1½ tsp |
| Salt | 1 tsp |
| Large eggs, room temperature | 2 |
| Whole milk | 1 cup |
| Vegetable oil | ½ cup |
| Vanilla extract | 2 tsp |
| Boiling water or hot coffee | 1 cup |
Chocolate Buttercream
| Ingredient | Amount |
| Unsalted butter, softened | 1 cup |
| Powdered sugar | 3½ cups |
| Unsweetened cocoa powder | ¾ cup |
| Heavy whipping cream | 3–4 tbsp |
| Vanilla extract | 1 tsp, optional |
Chocolate Ganache
| Ingredient | Amount |
| Semi-sweet chocolate chips | ½ cup |
| Heavy whipping cream | ⅓ cup |
Decoration
| Ingredient | Amount |
| Mini chocolate chips | ½ cup |
| Chocolate shavings | Optional |
| Fresh berries | Optional |
Step-by-Step Instructions
Prepare the Cake Pans
Preheat your oven to 350°F (175°C).
Grease two 8-inch round cake pans with butter or nonstick spray.
Line the bottoms with parchment paper.
This makes removing the baked cake layers much easier.
Mix the Dry Ingredients
Add the flour, sugar, cocoa powder, baking powder, baking soda, and salt to a large mixing bowl.
Whisk everything together until evenly combined.
If your cocoa powder contains lumps, sift it before mixing.
Add the Wet Ingredients
Add the eggs, milk, vegetable oil, and vanilla extract.
Beat on medium speed for approximately 2 minutes, until the batter is smooth.
The mixture should be well combined without visible pockets of dry ingredients.
Add the Hot Liquid
Slowly pour in the boiling water or hot coffee.
Stir carefully until completely incorporated.
The batter will become quite thin.
This is normal and helps create a moist chocolate crumb.
Bake the Cake
Divide the batter evenly between the prepared cake pans.
Place both pans in the preheated oven.
Bake for approximately 30–35 minutes.
Check the cakes by inserting a toothpick into the center.
The toothpick should come out clean or with only a few moist crumbs attached.
Avoid opening the oven repeatedly during baking.
Cool Completely
Remove the cakes from the oven.
Allow them to cool in their pans for approximately 10 minutes.
Carefully transfer the layers to wire racks.
Allow them to cool completely before frosting.
Warm cake layers can cause the buttercream to melt and slide.
Make the Chocolate Buttercream
Place the softened butter in a large mixing bowl.
Beat for approximately 2–3 minutes until light and creamy.
Gradually add the powdered sugar and cocoa powder.
Add the heavy cream one tablespoon at a time.
Continue beating for approximately 3–5 minutes until the frosting becomes smooth, fluffy, and spreadable.
If the frosting is too thick, add another small splash of cream.
If it is too soft, add a little more powdered sugar.
Assemble the Cake
Place the first completely cooled cake layer on a cake stand or serving plate.
Spread a generous layer of chocolate buttercream over the top.
Use an offset spatula to create an even layer.
Place the second cake layer carefully on top.
Press very gently so the layers remain level.
Frost the Cake
Apply a thin layer of buttercream around the entire cake.
This first layer is called a crumb coat and helps trap loose cake crumbs.
Refrigerate the cake for approximately 15–20 minutes.
Apply a second, thicker layer of buttercream.
Smooth the sides and top as evenly as possible.
Refrigerate the frosted cake for another 15–20 minutes before adding the ganache.
Prepare the Chocolate Ganache
Place the chocolate chips in a heatproof bowl.
Heat the heavy cream in a small saucepan over medium-low heat.
Remove it from the heat as soon as it begins to simmer around the edges.
Do not allow the cream to boil vigorously.
Pour the hot cream over the chocolate chips.
Let the mixture sit undisturbed for approximately 2 minutes.
Slowly whisk from the center outward until the chocolate becomes completely smooth and glossy.
Allow the ganache to cool slightly.
It should be fluid enough to drip but not hot enough to melt the buttercream.
Create the Chocolate Drip
Test one small drip on the side of the chilled cake.
If it runs too quickly toward the bottom, allow the ganache to cool for another few minutes.
If it barely moves, gently warm it until it reaches the correct consistency.
Use a squeeze bottle or small spoon to create individual drips around the edge of the cake.
Once the desired drips are created, pour the remaining ganache onto the center of the cake.
Use an offset spatula to gently spread it toward the edges.
Avoid pushing too much ganache over the sides.
Decorate the Cake
While the ganache is still slightly soft, sprinkle mini chocolate chips around the top edge.
You can also add chocolate curls, chocolate shavings, sprinkles, or fresh berries.
Refrigerate the finished cake for approximately 30 minutes to allow the ganache to set.
Before serving, let the cake sit at room temperature for approximately 15–20 minutes for the best buttercream texture.
Best Tips
Make sure the eggs and milk are close to room temperature for a smoother batter.
Do not worry if the chocolate cake batter looks unusually thin after adding the hot liquid.
Always cool the cake layers completely before frosting.
Use freshly opened baking powder and baking soda for reliable results.
Freshly sifted cocoa powder and powdered sugar help create a smoother buttercream.
Chill the frosted cake before creating the ganache drip.
Always test one drip before decorating the entire cake.
Use a sharp knife warmed in hot water for cleaner slices.
Wipe the knife clean between cuts for professional-looking portions.
Best Ingredient Options
Chocolate
Semi-sweet chocolate provides a balanced ganache.
Dark chocolate can be used for a more intense and less sweet flavor.
Milk chocolate can create a sweeter, softer chocolate profile.
Coffee
Hot coffee enhances the natural flavor of cocoa.
If you prefer not to use coffee, simply use boiling water.
Oil
Vegetable oil works well because it keeps the sponge moist.
Canola oil or another neutral-flavored oil can also be used.
Milk
Whole milk provides a rich cake texture.
Buttermilk can be used for an even more tender crumb.
Butter
Unsalted butter gives you better control over the salt level in the buttercream.
Plant-based butter can be used when appropriate for dietary preferences.
Recipe Variations
Chocolate Birthday Cake
Decorate the top with colorful sprinkles and birthday candles.
Salted Caramel Chocolate Cake
Add a thin layer of caramel between the cake layers.
Drizzle additional caramel over the finished ganache.
Finish with a small pinch of flaky sea salt.
Black Forest Chocolate Cake
Add a layer of cherry filling between the chocolate cake layers.
Decorate with chocolate shavings and cherries.
Triple Chocolate Cake
Add chocolate chips to the cake batter and use both chocolate buttercream and chocolate ganache.
Chocolate Raspberry Cake
Spread raspberry preserves between the cake layers.
Decorate with fresh raspberries and chocolate curls.
Mini Chocolate Drip Cakes
Bake the batter in a suitable sheet pan and cut small rounds from the cooled cake.
Stack the rounds with buttercream and finish with miniature ganache drips.
What to Serve With
Serve a slice with a cold glass of milk for a classic combination.
Fresh strawberries or raspberries provide a bright contrast to the rich chocolate.
Vanilla ice cream creates an especially indulgent dessert.
Freshly whipped cream also pairs beautifully with the chocolate sponge.
For adults, serve the cake alongside espresso or freshly brewed coffee.
Make-Ahead Instructions
The cake layers can be baked up to 2 days ahead.
Once completely cool, wrap each layer tightly in plastic wrap.
Store them at room temperature if the room is cool, or refrigerate them for longer storage.
The chocolate buttercream can be prepared 1 day ahead.
Store it in an airtight container in the refrigerator.
Bring the buttercream toward room temperature and re-whip it before assembling the cake.
For the best presentation, decorate the cake on the day you plan to serve it.
Storage
Store the finished cake in an airtight cake container.
If your room is cool, the cake can remain at room temperature for a short period.
For longer storage, refrigerate the cake for up to 5 days.
Cover exposed cut surfaces to help prevent the sponge from drying out.
Allow refrigerated slices to sit at room temperature for approximately 15–20 minutes before serving.
Reheating
This cake does not normally require reheating.
It is best served at cool room temperature.
If you prefer a softer, slightly warm slice, microwave one portion for approximately 10 seconds at medium power.
Check the texture before adding additional time.
Never microwave the cake with candles, metal decorations, or other unsuitable materials.
Freezing
The unfrosted cake layers freeze particularly well.
Wrap each completely cooled layer tightly in plastic wrap.
Then wrap it again in aluminum foil or place it in a freezer-safe bag.
Freeze for up to 2 months for best quality.
Thaw the wrapped layers overnight in the refrigerator.
Allow them to sit briefly before frosting.
For the best texture and appearance, it is preferable to decorate the cake after thawing.
Common Mistakes to Avoid
Frosting warm cake: Warm cake will soften the buttercream and make the layers difficult to decorate.
Using overheated ganache: Very hot ganache can melt the buttercream and create uncontrolled drips.
Making the ganache too thin: A thin ganache may run all the way to the bottom of the cake.
Skipping the crumb coat: A crumb coat helps create a cleaner final frosting layer.
Overmixing after adding flour: Mix only until the batter is properly combined.
Opening the oven too early: Frequent temperature changes can affect the structure of the cake.
Cutting with a cold, dull knife: A warm, sharp knife produces much cleaner slices.
Adding decorations too late: Chocolate chips and other toppings adhere better while the ganache is still slightly soft.
Nutrition Estimate
These values are approximate and can vary depending on ingredients, portion size, and decoration.
| Nutritional Parameter | Estimated Amount Per Serving |
| Calories | 520 kcal |
| Total Fat | 26 g |
| Saturated Fat | 12 g |
| Cholesterol | 65 mg |
| Sodium | 390 mg |
| Total Carbohydrates | 68 g |
| Dietary Fiber | 4 g |
| Sugars | 51 g |
| Protein | 6 g |
Frequently Asked Questions
Can I make this cake in different pan sizes?
Yes.
You can use three 6-inch cake pans for a taller cake, adjusting the baking time as needed.
A 9 × 13-inch pan can also be used for a simpler sheet cake.
Always check the cake for doneness rather than relying only on the stated baking time.
Why did my ganache drip run to the bottom?
The ganache was probably too warm or too thin.
Let it cool slightly and test one drip on the chilled cake before decorating the entire cake.
Can I use store-bought chocolate frosting?
Yes.
Homemade chocolate buttercream provides excellent flavor and texture, but a quality store-bought frosting can save time.
Can I make the cake without coffee?
Absolutely.
Replace the coffee with boiling water.
Coffee simply intensifies the chocolate flavor.
Why is my cake dry?
Overbaking is one of the most common causes.
Begin checking the cake near the lower end of the recommended baking time.
Also make sure your flour is measured accurately.
How do I get smooth cake sides?
Apply a crumb coat first.
Chill the cake before adding the final buttercream layer.
Use an offset spatula or cake scraper to smooth the sides.
How far in advance can I make this cake?
The sponge layers can be prepared up to 2 days ahead, while the buttercream can be made approximately 1 day ahead.
For the freshest presentation, assemble and decorate the cake close to serving time.
Final Thoughts
This Ultimate Decadent Chocolate Drip Cake is a beautiful centerpiece for birthdays, anniversaries, holidays, and other special celebrations.
The combination of moist chocolate sponge, creamy buttercream, glossy ganache, and chocolate chips creates an irresistible dessert with plenty of texture and flavor.
With a few simple decorating techniques, you can create a professional-looking chocolate cake right in your own kitchen.
For the best results, take your time with cooling, frosting, chilling, and the ganache drip.
The final result is a rich, impressive, and indulgent homemade chocolate cake that is perfect for sharing.
:::