Introduction
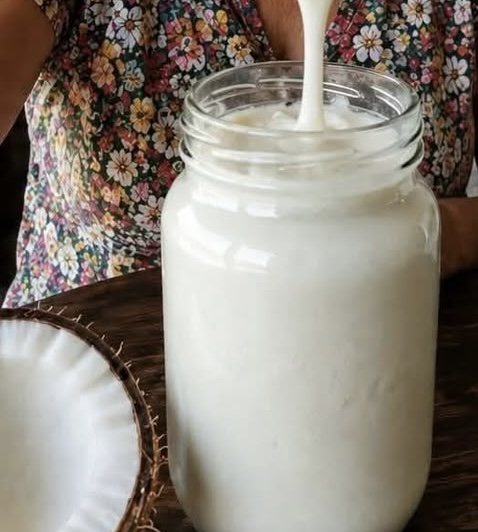
If you’re looking for a healthy homemade coconut yogurt recipe, this simple, creamy, and naturally dairy-free option is a wonderful addition to your breakfast or snack routine. Made with rich coconut milk and probiotic cultures, it has a smooth texture and a mildly tangy flavor that’s easy to customize with your favorite fruits and toppings.
Although images and social media posts sometimes claim coconut yogurt can “repair” joints or knees, there is no scientific evidence that any single food or homemade recipe can repair damaged knee cartilage or cure arthritis. Coconut yogurt can be part of a balanced diet, but it should not replace medical treatment.
Recipe Overview
| Recipe Details | Information |
| Recipe Name | Homemade Coconut Yogurt |
| Prep Time | 10 minutes |
| Fermentation Time | 12–24 hours |
| Chill Time | 4 hours |
| Total Time | 16–28 hours |
| Yield | 4 servings |
| Difficulty | Easy |
Why You’ll Love This Recipe
This homemade coconut yogurt has a rich, creamy texture without using dairy, making it perfect for anyone following a vegan or dairy-free lifestyle.
It’s made with only a few wholesome ingredients and contains live probiotic cultures that may help support digestive health.
The recipe is easy to customize with fresh fruit, nuts, seeds, cinnamon, or natural sweeteners to match your taste.
Preparing yogurt at home allows you to avoid unnecessary preservatives, artificial flavors, and excess sugar often found in some store-bought varieties.
Ingredients
Main Ingredients
| Ingredient | Amount |
| Full-fat canned coconut milk | 2 cans (13.5 oz / 400 ml each) |
| Probiotic capsules (opened) | 2 capsules |
| Maple syrup or honey (optional) | 1 tablespoon |
| Tapioca starch or cornstarch (optional, for thicker yogurt) | 1 tablespoon |
| Vanilla extract (optional) | 1 teaspoon |
Step-by-Step Instructions
Pour the coconut milk into a saucepan and whisk until smooth.
If using tapioca starch or cornstarch, whisk it into the coconut milk before heating.
Warm the mixture gently over medium-low heat to about 110°F (43°C). Do not boil.
Allow the mixture to cool to approximately 105–110°F (40–43°C) if necessary.
Stir in the probiotic powder from the capsules until fully combined.
Transfer the mixture to clean glass jars.
Cover loosely with a clean cloth or lid.
Let the yogurt ferment in a warm place for 12–24 hours, depending on how tangy you like it.
Refrigerate for at least 4 hours before serving to allow the yogurt to thicken.
Serve chilled with your favorite toppings.
Best Tips
Use full-fat coconut milk for the creamiest consistency.
Avoid coconut milk containing many additives, as they can affect fermentation.
Keep all utensils and jars clean to encourage proper fermentation.
Longer fermentation creates a tangier flavor, while shorter fermentation results in a milder yogurt.
Always refrigerate the yogurt before serving for the best texture.
Best Ingredient Options
Replace maple syrup with honey, agave syrup, or leave it unsweetened.
Add vanilla bean paste instead of vanilla extract for a richer flavor.
Mix in chia seeds after fermentation for a naturally thicker consistency.
Top with berries, sliced bananas, toasted coconut, granola, almonds, walnuts, or pumpkin seeds.
Recipe Variations
Blend mango puree into the finished yogurt for a tropical version.
Stir in fresh blueberries and a drizzle of honey for a naturally sweet breakfast.
Add cinnamon and nutmeg for a warm spiced flavor.
Mix cocoa powder with a little maple syrup for a chocolate coconut yogurt.
Create a parfait by layering yogurt with granola and fresh fruit.
What to Serve With
Serve alongside homemade granola for a satisfying breakfast.
Enjoy with fresh berries, kiwi, peaches, or pineapple.
Use it in smoothie bowls topped with seeds and nuts.
Pair it with pancakes, waffles, or healthy muffins.
Use it as a dairy-free topping for fruit salads.
Make-Ahead Instructions
Prepare the yogurt several days before serving.
Allow it to chill overnight for the best flavor and consistency.
Add fresh fruit and crunchy toppings just before serving.
Storage
Store the yogurt in airtight glass containers.
Keep refrigerated for up to 7 days.
Always use a clean spoon when serving.
Reheating
This recipe is intended to be served cold.
Do not reheat after fermentation, as excessive heat may reduce the viability of the live probiotic cultures.
Freezing
Freeze in freezer-safe containers for up to 2 months.
Thaw overnight in the refrigerator before serving.
The texture may become slightly grainy after freezing, but it remains suitable for smoothies and recipes.
Common Mistakes to Avoid
Using boiling-hot coconut milk may destroy the probiotic cultures.
Choosing low-fat coconut milk often results in a thinner yogurt.
Fermenting in a cold room may prevent the yogurt from thickening properly.
Using dirty equipment can interfere with successful fermentation.
Expecting homemade yogurt to have the exact texture of commercial yogurt may lead to disappointment because commercial products often contain additional thickeners.
Nutrition Estimate
| Nutrient | Per Serving |
| Calories | 240 |
| Fat | 23 g |
| Carbohydrates | 8 g |
| Protein | 2 g |
| Fiber | 2 g |
| Sugar | 4 g |
| Sodium | 20 mg |
Frequently Asked Questions
Can I make this without probiotics?
No. A probiotic starter or yogurt culture is needed to ferment the coconut milk properly.
Why didn’t my yogurt thicken?
Low-fat coconut milk, cool fermentation temperatures, or inactive probiotic capsules are common reasons.
Can I sweeten it after fermentation?
Yes. Many people prefer adding sweeteners after fermentation to better control the flavor.
Is coconut yogurt good for digestion?
When made with live probiotic cultures, it may help support a healthy gut microbiome as part of a balanced diet.
Final Thoughts
This Homemade Coconut Yogurt Recipe is creamy, simple, and versatile. It’s an excellent dairy-free alternative that’s easy to personalize with fresh fruit, nuts, seeds, and natural sweeteners. While it’s a nutritious food that can fit into a healthy lifestyle, it’s important to remember that no homemade recipe can repair damaged knees, regenerate cartilage, or cure arthritis. For persistent joint pain or mobility problems, consult a qualified healthcare professional for proper evaluation and treatment.
⚠️This recipe may not be suitable for everyone, so it is advisable to consult a doctor.