Welcome to what is guaranteed to become one of your go-to easy dessert recipes. If you are searching for a show-stopping sweet treat that requires zero oven time, this luxurious pie is the ultimate crowd-pleaser.
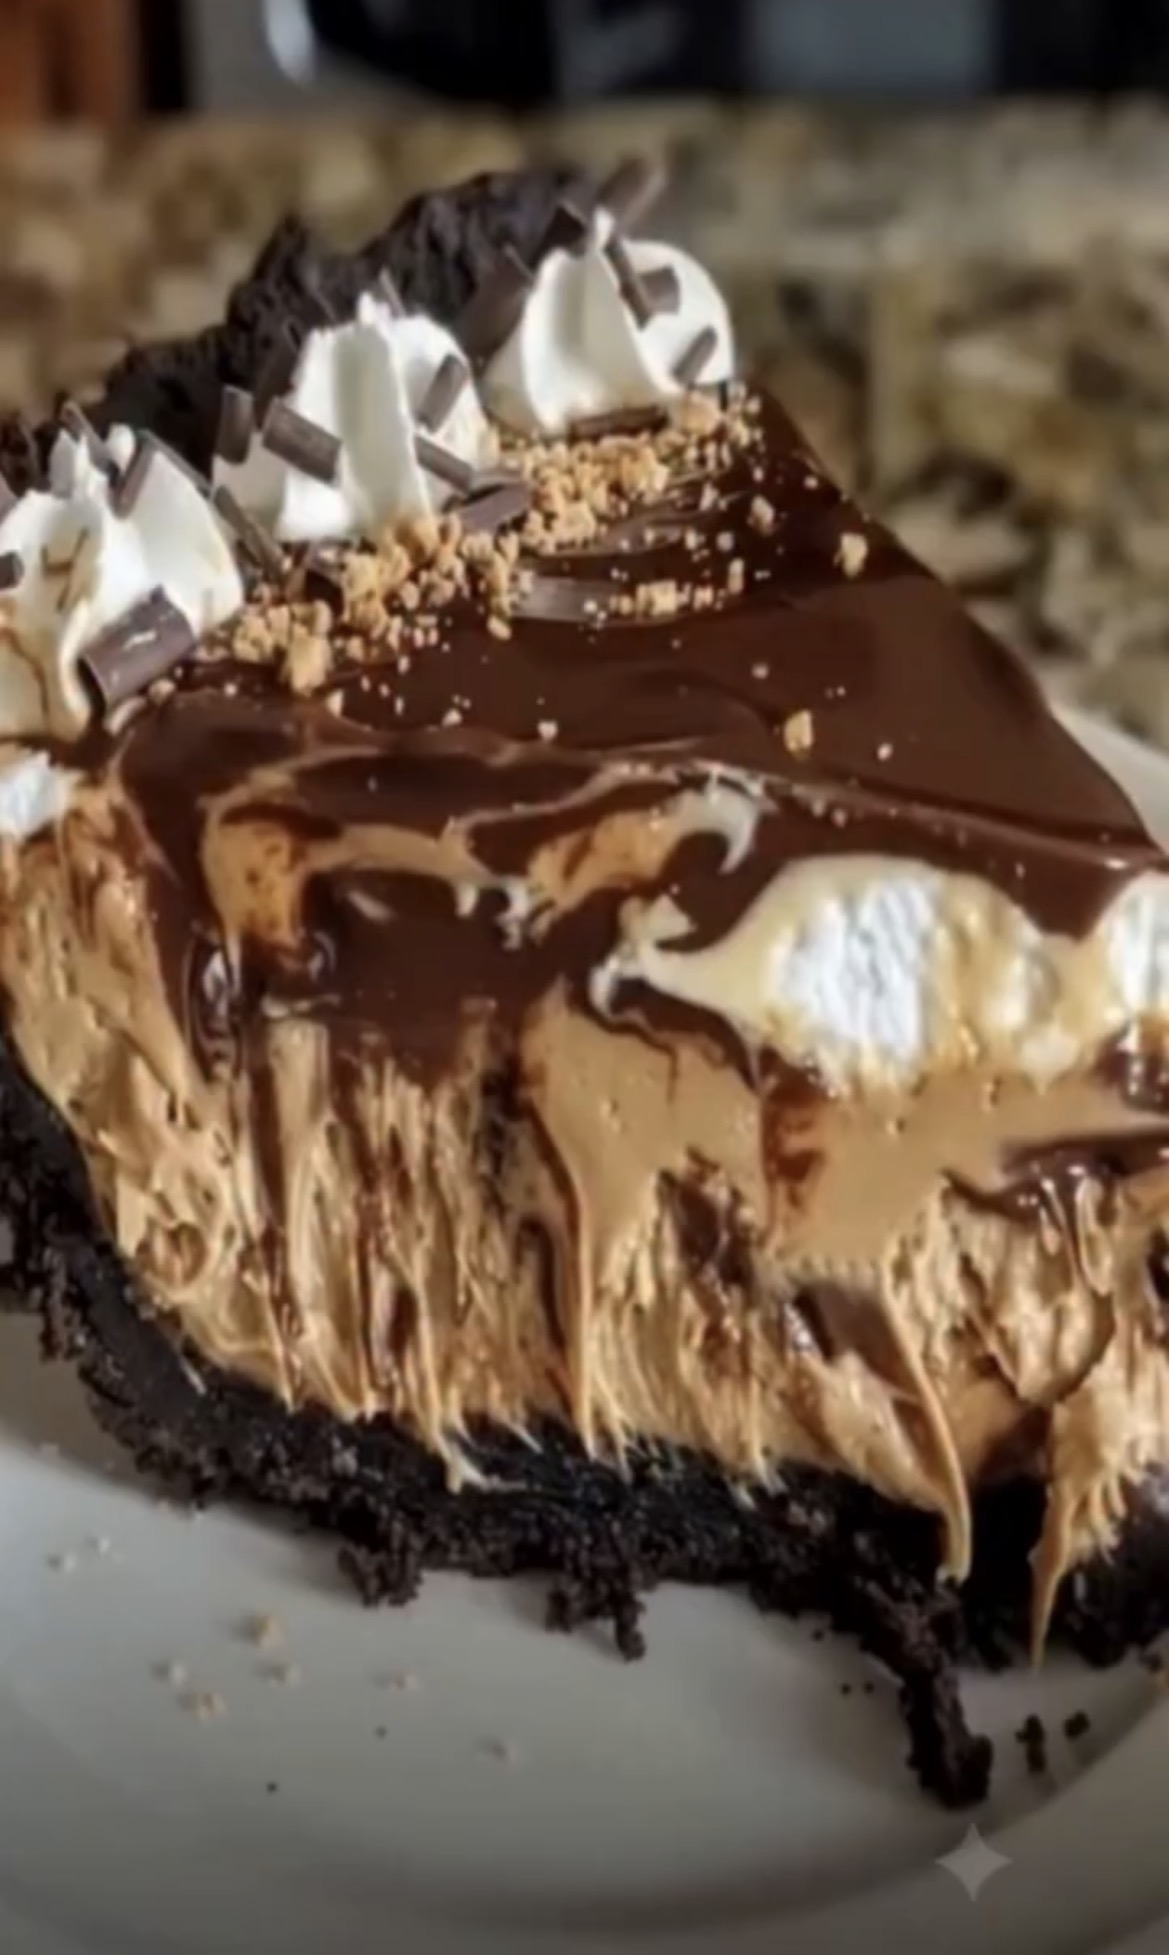
As you can clearly see in the file named image_2.png, this masterpiece features a thick chocolate cookie crust, a mile-high fluffy peanut butter filling marbled with rich fudge, and beautiful garnishes.
It is the perfect chocolate peanut butter dessert for holidays, potlucks, or simply satisfying a serious weekend sweet tooth.
Recipe Overview
| Category | Details |
| Prep Time | 20 Minutes |
| Chill Time | 4 Hours |
| Total Time | 4 Hours 20 Minutes |
| Yield | 8 to 10 Servings |
| Difficulty | Easy |
Why You’ll Love This Recipe
You will absolutely fall in love with how incredibly effortless this gourmet-looking pie is to put together. It completely takes the stress out of entertaining because it requires absolutely no baking, freeing up your oven and your schedule.
The flavor profile is an absolute dream for anyone who loves high-quality sweet treats. The slight tang of the cream cheese perfectly balances the rich, sweet peanut butter and the dark, intense chocolate fudge, ensuring every bite is rich but never overwhelmingly sweet.
Furthermore, it is one of the best make-ahead dessert ideas you can have in your culinary arsenal. Because it needs ample time to chill and set in the refrigerator, you can easily prepare it a day or two before your event, allowing you to actually relax and enjoy your own party.
Ingredients
| Crust Ingredients | Quantity |
| Chocolate Sandwich Cookies (crushed) | 24 cookies (about 2 cups crumbs) |
| Unsalted Butter (melted) | 5 tablespoons |
| Peanut Butter Filling | Quantity |
| Cream Cheese (softened to room temp) | 8 oz (225g) |
| Creamy Peanut Butter | 1 cup (250g) |
| Powdered Sugar | 1 cup (120g) |
| Pure Vanilla Extract | 1 teaspoon |
| Heavy Whipping Cream (cold) | 1 1/2 cups (360ml) |
| Toppings & Swirls | Quantity |
| Hot Fudge Topping (warmed slightly) | 3/4 cup |
| Whipped Cream | 1/2 cup |
| Chocolate Curls or Mini Chips | 2 tablespoons |
| Crushed Peanut Butter Candies | 2 tablespoons |
Step-by-Step Instructions
Step 1: Prepare the Crust Place the chocolate sandwich cookies (filling and all) into a food processor and pulse until they become fine crumbs. Pour in the melted butter and pulse again until the mixture resembles wet sand.
Step 2: Form the Crust Press the buttery cookie crumbs firmly into the bottom and up the sides of a 9-inch deep-dish pie plate. Place the crust in the freezer for 15 minutes to firm up while you prepare the filling.
Step 3: Whip the Cream In a chilled bowl, beat the cold heavy whipping cream until stiff peaks form. Set this aside in the refrigerator.
Step 4: Mix the Peanut Butter Base In a separate large mixing bowl, beat the softened cream cheese and creamy peanut butter together until completely smooth and combined. Gradually mix in the powdered sugar and vanilla extract.
Step 5: Fold and Swirl Gently fold the prepared whipped cream into the heavy peanut butter mixture using a rubber spatula until no white streaks remain. Drizzle half of the warmed hot fudge over the filling and gently fold exactly twice to create beautiful thick swirls.
Step 6: Assemble and Chill Spoon the swirled filling into your chilled crust, smoothing the top lightly. Cover the pie loosely with plastic wrap and refrigerate for at least 4 hours, or preferably overnight, until completely set.
Step 7: Garnish and Serve Right before serving, spread the remaining hot fudge over the top of the chilled pie. Pipe small stars of whipped cream around the border and sprinkle generously with chocolate curls and crushed peanut butter candies.
Best Tips
To achieve the absolute silkiest texture for your filling, you must ensure your cream cheese is completely softened to room temperature before you begin mixing. Cold cream cheese will result in stubborn, unappetizing lumps in your delicate pie.
When folding the whipped cream into the peanut butter base, take your time and use a very gentle motion. Aggressive stirring will deflate the air you just whipped into the cream, leaving you with a dense, heavy dessert instead of a light, fluffy cloud.
For the cleanest slices, run a sharp chef’s knife under hot water and wipe it dry with a towel between every single cut. This melts cleanly through the fudge topping and the dense peanut butter filling without dragging crumbs everywhere.
Best Ingredient Options
Always opt for a standard, commercial creamy peanut butter like Jif or Skippy for this specific recipe. Natural peanut butters that require stirring can separate and ruin the structural integrity of your no-bake pie.
For the crust, classic name-brand Oreos provide the best ratio of cookie to cream, which acts as a binder. If you use store-bought pre-crushed cookie crumbs, you may need to add an extra tablespoon of melted butter to hold it together.
While store-bought frozen whipped topping can be used in a pinch to save time, taking five extra minutes to whip real, high-fat heavy cream will elevate this pie to a true bakery-quality dessert.
Recipe Variations
If you love the combination of sweet and salty, you can easily swap out the chocolate cookie crust for a homemade pretzel crust. Simply pulse salted pretzels with a little sugar and melted butter for an incredible flavor contrast.
For an extra layer of crunch and surprise, try chopping up your favorite peanut butter cups and folding them directly into the filling before transferring it to the pie dish.
You can also transform this into a mocha peanut butter pie by adding a teaspoon of high-quality espresso powder to the heavy cream before whipping it. The coffee notes will intensely highlight the rich chocolate fudge.
What to Serve With
Because this pie is incredibly rich and decadent, it pairs perfectly with a hot, freshly brewed cup of dark roast coffee or a shot of strong espresso to cleanse the palate.
For a fun, family-friendly dessert experience, serve large slices alongside ice-cold glasses of whole milk. The milk perfectly washes down the dense peanut butter and chocolate flavors.
If you are feeling particularly indulgent, a small scoop of premium vanilla bean ice cream on the side adds a lovely temperature contrast and a creamy, mellow flavor that complements the intense pie.
Make-Ahead Instructions
You can fully assemble this pie, minus the top layer of fudge and garnishes, up to 48 hours in advance. Keep it tightly wrapped in the refrigerator.
Add the final fudge topping, whipped cream rosettes, and candy crumbles just an hour or two before you plan to slice and serve it.
Storage
Store any leftover pie in the refrigerator at all times, as the dairy and cream cheese will spoil at room temperature.
Keep it in an airtight container, or loosely tented with foil, for up to 5 days to maintain the freshest flavor and texture.
Reheating
Because this is a no-bake, chilled dessert, reheating is absolutely not recommended. Heat will completely melt the whipped cream and cream cheese structure, turning your beautiful pie into soup.
Simply serve this dessert cold, straight from the refrigerator, for the best possible experience.
Freezing
This pie freezes exceptionally well. Flash freeze the pie uncovered for two hours until the filling is firm to the touch.
Once firm, wrap the entire pie tightly in two layers of plastic wrap and one layer of aluminum foil. Freeze for up to 2 months, and thaw in the refrigerator overnight before serving.
Common Mistakes to Avoid
One frequent error is skipping the chilling time for the crust before adding the heavy filling. If you do not let the buttery cookie crumbs set in the freezer, the crust will crumble and mix directly into your peanut butter layer.
Another major mistake is using cold or even slightly cool hot fudge when creating your swirls. The fudge must be slightly warmed so it is fluid enough to swirl without tearing the delicate peanut butter mousse apart.
Finally, resist the urge to rush the four-hour refrigeration time. Slicing into the pie too early will result in a messy, slumping slice that, while delicious, completely lacks the gorgeous structural presentation intended.
Nutrition Estimate
| Nutritional Value | Amount per Serving (Based on 10 slices) |
| Calories | 520 kcal |
| Protein | 10g |
| Fat | 38g |
| Carbohydrates | 42g |
Frequently Asked Questions
Can I use a store-bought crust? Yes, if you are short on time, a store-bought Oreo or graham cracker crust will work beautifully. Just note that store-bought crusts are often slightly smaller, so you may have a little extra filling left over.
Why did my filling turn out runny? This usually happens if the heavy whipping cream was not whipped to stiff peaks before folding it in, or if you overmixed the filling and deflated the air. Ensure your cream is very stiff and cold.
Is there a way to make this gluten-free? Absolutely. You can easily make this a gluten-free dessert by simply swapping the standard chocolate sandwich cookies for a certified gluten-free brand of chocolate cookies for the crust.
Final Thoughts
This No-Bake Chocolate Peanut Butter Pie is a sensational dessert that delivers bakery-level results with very little effort. It is rich, beautifully layered, and sure to impress everyone at your table.
Enjoy making this gorgeous, stress-free sweet treat for your next special occasion. Who are you going to share the first slice with?