Introduction
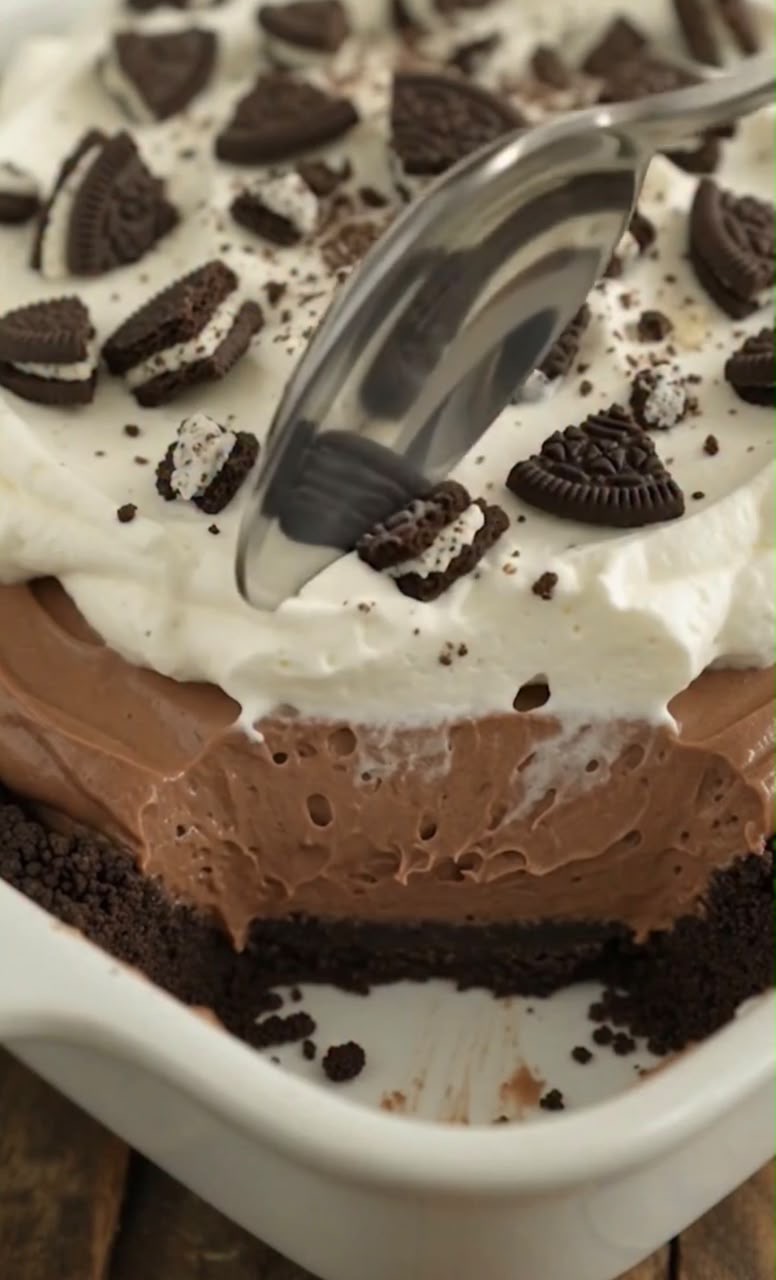
This No-Bake Oreo Chocolate Mousse Cake is an irresistibly creamy dessert made with a crunchy Oreo cookie crust, a rich and silky chocolate mousse layer, and a fluffy whipped cream topping covered with crushed Oreo cookies.
The contrast between the crunchy chocolate cookie base, smooth chocolate filling, and light whipped cream makes every bite incredibly indulgent. Best of all, there is no oven required, making this an easy dessert for birthdays, holidays, family gatherings, or whenever you want something special without complicated baking.
Recipe Overview
| Category | Details |
| Prep Time | 30 minutes |
| Chilling Time | 6 hours |
| Total Time | About 6½ hours |
| Servings | 10–12 |
| Difficulty | Easy |
| Cooking Method | No-bake |
| Main Flavor | Chocolate & Oreo |
| Pan Size | 8-inch (20 cm) springform pan |
| Best Served | Chilled |
Why You’ll Love This Recipe
This dessert delivers several delicious textures in one slice. The Oreo crust is firm and crunchy, the chocolate mousse is soft and creamy, and the whipped cream topping keeps everything light.
The recipe is also incredibly convenient because it doesn’t require baking. Once assembled, the cake simply rests in the refrigerator until the layers are firm enough to slice.
If you’re a chocolate and Oreo lover, this is the kind of dessert that feels luxurious while still being surprisingly simple to make.
Ingredients
For the Oreo Crust 🍪
| Ingredient | Amount |
| Oreo cookies | 24 cookies |
| Unsalted butter, melted | 5 tbsp (70 g) |
| Pinch of salt | Optional |
For the Chocolate Mousse 🍫
| Ingredient | Amount |
| Semi-sweet chocolate | 7 oz (200 g) |
| Heavy whipping cream | 1½ cups (360 ml) |
| Powdered sugar | ⅓ cup (40 g) |
| Vanilla extract | 1 tsp |
| Unsweetened cocoa powder | 2 tbsp |
| Pinch of salt | Optional |
For the Whipped Cream Topping 🤍
| Ingredient | Amount |
| Heavy whipping cream | 1 cup (240 ml) |
| Powdered sugar | 2 tbsp |
| Vanilla extract | ½ tsp |
For Decoration 🍪
| Ingredient | Amount |
| Oreo cookies, roughly crushed | 8–10 cookies |
| Mini Oreo cookies | Optional |
| Chocolate shavings | Optional |
Step-by-Step Instructions
1. Prepare the Oreo Crust
Place the Oreo cookies in a food processor and pulse until they become fine crumbs.
You can also place the cookies in a sealed bag and crush them with a rolling pin.
Transfer the crumbs to a bowl and add the melted butter.
Mix until all the crumbs are evenly coated and the mixture resembles wet sand.
2. Press the Crust Into the Pan
Line the bottom of an 8-inch (20 cm) springform pan with parchment paper.
Pour the Oreo mixture into the pan.
Press it firmly and evenly across the bottom using the back of a spoon or the bottom of a glass.
Refrigerate for at least 20–30 minutes while preparing the chocolate mousse.
Making the Chocolate Mousse
3. Melt the Chocolate
Finely chop the chocolate and place it in a heatproof bowl.
Heat about ½ cup of the heavy cream until hot but not boiling.
Pour the warm cream over the chocolate and let it sit for about 2 minutes.
Stir gently until the chocolate becomes completely melted and smooth.
Allow the chocolate mixture to cool until it is slightly warm or close to room temperature.
4. Whip the Cream
Pour the remaining heavy cream into a large chilled mixing bowl.
Add the powdered sugar, cocoa powder, and vanilla extract.
Beat with an electric mixer on medium-high speed until you achieve soft to medium peaks.
Do not overwhip the cream.
5. Combine the Chocolate and Cream
Add about one-third of the whipped cream to the cooled melted chocolate.
Fold gently until combined.
Add the remaining whipped cream in two additions.
Fold carefully with a spatula until the mixture is smooth, fluffy, and evenly chocolate-colored.
Avoid vigorous mixing because you don’t want to lose the air incorporated into the whipped cream.
6. Add the Chocolate Mousse
Remove the Oreo crust from the refrigerator.
Spoon the chocolate mousse over the crust.
Spread the top evenly with a spatula.
Gently tap the pan against the counter once or twice to remove any large air pockets.
7. Chill the Chocolate Layer
Cover the pan and refrigerate for at least 4–6 hours.
For the cleanest slices and firmest texture, refrigerate overnight.
Making the Whipped Cream Topping
8. Whip the Cream
Place the cold heavy cream in a mixing bowl.
Add powdered sugar and vanilla extract.
Beat until the cream becomes thick and holds firm peaks.
Be careful not to overbeat it into butter.
9. Add the Whipped Cream
Once the chocolate mousse layer is firm, spread the whipped cream evenly over the top.
You can create a completely smooth surface or use a spatula to make soft decorative swirls, similar to the dessert shown in the image.
10. Add the Oreo Decoration
Roughly crush several Oreo cookies.
Scatter the cookie pieces generously over the whipped cream.
For an even prettier presentation, add a few mini Oreo cookies or chocolate shavings around the top.
11. Final Chill
Return the finished cake to the refrigerator for at least 1–2 hours before serving.
This extra chilling time helps all the layers become firm and makes slicing much easier.
How to Slice the Cake
For clean slices, remove the cake from the refrigerator immediately before serving.
Run a thin knife under hot water, dry it completely, and carefully slice through the cake.
Wipe the knife clean between cuts and repeat.
This technique creates much cleaner layers and prevents the chocolate mousse from sticking excessively to the knife.
Best Tips
Use full-fat heavy whipping cream because it provides better structure and produces a richer mousse.
Make sure the melted chocolate isn’t hot when you combine it with the whipped cream. Hot chocolate can deflate the cream and create a loose mousse.
Press the Oreo crust firmly into the pan. A compact crust will hold together much better when sliced.
Don’t rush the chilling process. The refrigerator is what gives the mousse its beautiful sliceable texture.
For the best results, prepare the cake the day before serving and let it chill overnight.
Best Ingredient Options
Oreo Cookies 🍪
Classic Oreo cookies work perfectly, but you can use chocolate crème cookies, Golden Oreos, or another chocolate sandwich cookie.
Chocolate 🍫
Semi-sweet chocolate gives a balanced flavor.
Dark chocolate creates a more intense, less sweet mousse, while milk chocolate produces a sweeter and creamier dessert.
Cream 🤍
Use heavy whipping cream with a high fat content for the best volume and stability.
Vanilla
Pure vanilla extract gives the mousse and whipped cream a warm, aromatic flavor.
Recipe Variations
Triple Chocolate Oreo Cake 🍫
Add chocolate chips or chocolate shavings between the mousse and whipped cream layers for an even more decadent dessert.
Mint Oreo Chocolate Cake 🌿
Add ¼ teaspoon peppermint extract to the chocolate mousse for a refreshing chocolate-mint flavor.
Peanut Butter Oreo Cake 🥜
Add a thin layer of creamy peanut butter between the Oreo crust and chocolate mousse.
White Chocolate Oreo Cake 🤍
Replace part of the semi-sweet chocolate with melted white chocolate for a sweeter, creamier variation.
Mocha Oreo Cake ☕
Add 1–2 teaspoons of instant espresso powder to the melted chocolate for a deeper coffee-chocolate flavor.
What to Serve With
This Oreo chocolate mousse cake is rich enough to serve on its own.
For an extra indulgent dessert, serve each slice with fresh strawberries, raspberries, chocolate sauce, caramel sauce, or a small scoop of vanilla ice cream.
A cup of coffee, espresso, or cold milk also pairs beautifully with the rich chocolate flavor.
Make-Ahead Instructions
This cake is ideal for making ahead.
You can prepare it 1–2 days before serving and keep it covered in the refrigerator.
For the best presentation, add the final crushed Oreo topping a few hours before serving so the cookies retain some of their texture.
Storage
Store the finished cake covered in the refrigerator.
It will keep well for approximately 3–4 days.
Because the dessert contains whipped cream and dairy, keep it refrigerated until ready to serve.
Reheating
This is a no-bake chilled dessert, so it should not be reheated.
Serve directly from the refrigerator.
Freezing
You can freeze the chocolate mousse cake for up to 1 month.
For the best texture, freeze it without the final whipped cream and Oreo topping if possible.
Wrap the cake tightly and place it in a freezer-safe container.
Thaw overnight in the refrigerator before adding fresh whipped cream and crushed Oreos.
Common Mistakes to Avoid
Using Hot Chocolate
Hot melted chocolate can cause the whipped cream to collapse. Allow the chocolate to cool before folding it into the cream.
Under-Whipping the Cream
Cream that is too loose will produce a mousse that doesn’t hold its shape well.
Over-Whipping the Cream
Overwhipped cream can become grainy and difficult to incorporate smoothly.
Not Pressing the Crust Firmly
A loose Oreo crust can crumble when you cut the cake.
Not Chilling Long Enough
The mousse needs several hours to become firm enough for clean slices.
Cutting the Cake While Warm
Always keep this dessert chilled. It becomes much easier to slice when thoroughly refrigerated.
Nutrition Estimate
Approximate values per serving, based on 12 servings.
| Nutrient | Estimated Amount |
| Calories | 470 kcal |
| Protein | 5 g |
| Carbohydrates | 39 g |
| Fat | 33 g |
| Saturated Fat | 18 g |
| Fiber | 3 g |
| Sugar | 25 g |
| Sodium | 250 mg |
Nutrition values are estimates and will vary depending on the cookies, chocolate, cream, and portion size used.
Frequently Asked Questions
Does this cake need to be baked?
No. This is a completely no-bake Oreo chocolate mousse cake. The refrigerator does all the work of setting the layers.
Can I make it without a springform pan?
Yes. You can use a deep pie dish or an 8-inch square baking dish. However, a springform pan makes it much easier to remove the entire cake.
Can I use milk chocolate?
Yes. Milk chocolate creates a sweeter and milder mousse. If using milk chocolate, you may want to reduce the powdered sugar slightly.
How long should the cake chill?
For the best results, chill it for at least 6 hours. Overnight is even better.
Why is my mousse too soft?
The chocolate may have been too warm, the cream may not have been whipped enough, or the cake may not have chilled long enough. Give it additional refrigeration time before slicing.
Can I use store-bought whipped cream?
Yes, but freshly whipped cream provides better flavor and structure.
Can I add more Oreos?
Absolutely. Add extra crushed Oreos to the mousse, between the layers, or generously over the top.
Final Thoughts
This No-Bake Oreo Chocolate Mousse Cake 🍫🍪✨ is a dream dessert for chocolate and cookie lovers.
The crunchy Oreo crust, silky chocolate mousse, fluffy whipped cream, and generous Oreo topping create an irresistible combination of textures and flavors.
It looks impressive, requires no oven, and can be prepared ahead of time, making it a perfect dessert for special occasions or an easy weekend treat.