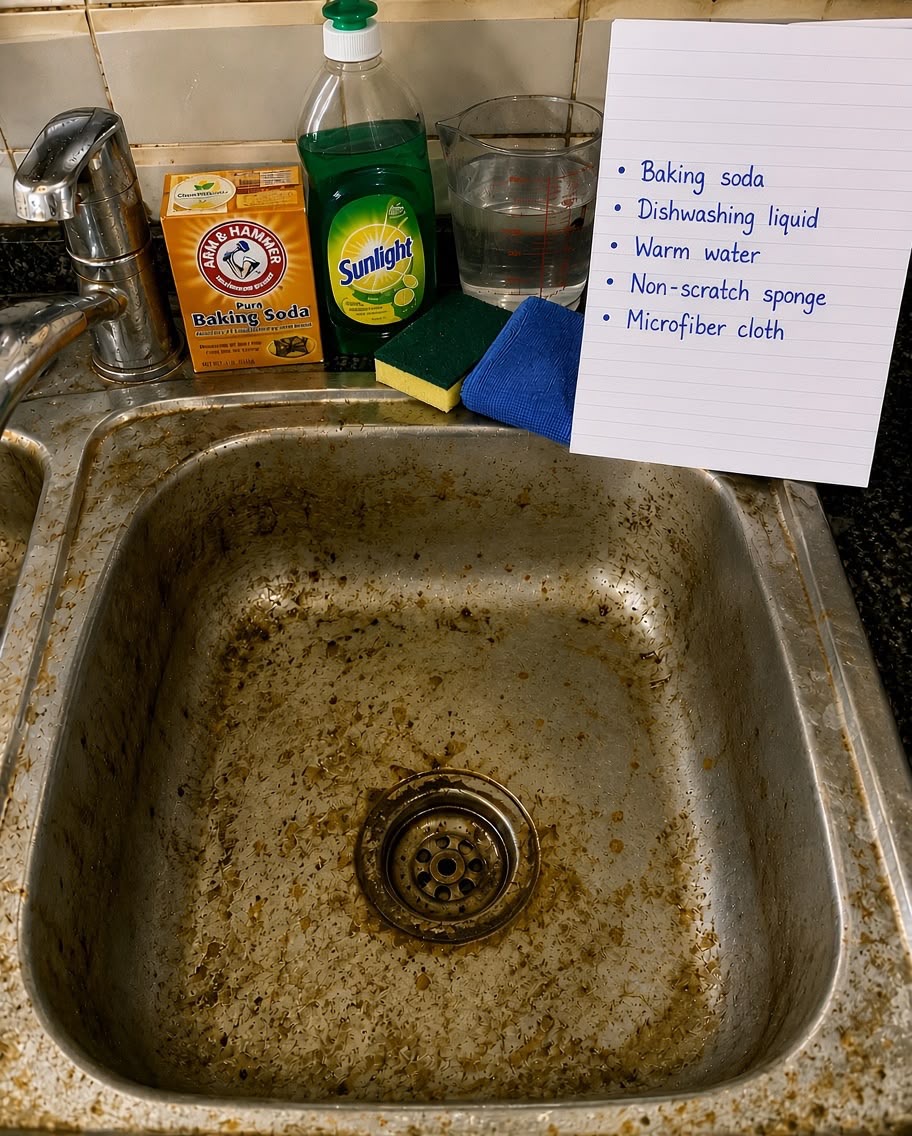
A dirty kitchen sink can quickly become one of the most unpleasant areas in the home. Food residue, grease, hard-water stains, and everyday buildup can leave the surface looking dull and grimy.
Fortunately, you do not need expensive cleaning products to get your sink looking fresh again. A few simple household ingredients, including baking soda, dishwashing liquid, warm water, a non-scratch sponge, and a microfiber cloth, can make a big difference.
This simple kitchen sink cleaning method is ideal for stainless steel sinks and can be completed in just a few minutes.
Recipe Overview
| Category | Details |
| Cleaning Method | Baking Soda & Dish Soap Sink Cleaning |
| Best For | Stainless Steel Kitchen Sinks |
| Preparation Time | 5 minutes |
| Cleaning Time | 10–15 minutes |
| Total Time | About 20 minutes |
| Difficulty | Easy |
| Best For | Grease, food residue, stains, and everyday buildup |
| Supplies Needed | 5 |
| Frequency | 2–4 times per week for regular cleaning |
Why You’ll Love This Cleaning Method
This homemade sink cleaner uses inexpensive ingredients that are easy to keep in your kitchen.
Baking soda provides gentle scrubbing power that can help loosen stuck-on food and grime without requiring harsh abrasive cleaners.
Dishwashing liquid helps break down grease and oily residue left behind after washing dishes.
Warm water makes the cleaning process easier by helping loosen accumulated dirt and food particles.
The method is also simple enough for everyday kitchen cleaning and does not require complicated equipment.
Most importantly, you can finish the process with a microfiber cloth to leave the sink looking cleaner, smoother, and more polished.
Ingredients
Cleaning Supplies
| Ingredient or Supply | Amount |
| Baking soda | ½ cup |
| Dishwashing liquid | 1–2 tablespoons |
| Warm water | 2–3 cups |
| Non-scratch sponge | 1 |
| Microfiber cloth | 1 |
Optional Supplies
| Supply | Amount |
| Old toothbrush | 1 |
| Small cleaning brush | 1 |
| Dry towel | 1 |
| Rubber gloves | 1 pair |
Step-by-Step Instructions
Step 1: Empty the Sink
Remove all dishes, utensils, food scraps, and other items from the sink.
Check around the drain and remove any visible pieces of food or debris.
This makes it much easier to clean the entire surface properly.
Step 2: Rinse With Warm Water
Turn on the warm water and rinse the entire sink.
Pay particular attention to the corners, sides, and area around the drain.
Let the warm water run for about 30–60 seconds.
This helps loosen greasy residue and dried food particles before scrubbing.
Step 3: Apply Dishwashing Liquid
Add approximately 1–2 tablespoons of dishwashing liquid directly to the damp sink.
Spread it around the bottom and sides using your sponge.
Dish soap helps lift grease and oily residue that baking soda alone may not remove as easily.
Step 4: Add Baking Soda
Sprinkle approximately ½ cup of baking soda evenly across the sink.
Focus on areas with visible buildup or stains.
You do not need to create a very thick layer. A light, even coating is enough.
Step 5: Scrub the Sink
Use a non-scratch sponge to gently scrub the sink.
Work in small circular motions, starting from the sides and working toward the drain.
For stainless steel sinks, following the direction of the metal grain can help reduce the chance of leaving visible scratches.
Spend extra time around the drain, faucet base, corners, and areas where food residue tends to collect.
Step 6: Clean Around the Drain
Sprinkle a small amount of baking soda around the drain.
Add a few drops of dishwashing liquid.
Use the sponge or an old toothbrush to gently scrub around the drain opening.
This area often collects grease, food particles, and unpleasant buildup.
Step 7: Rinse Thoroughly
Rinse the entire sink with warm running water.
Make sure all baking soda and dish soap residue has been removed.
Continue rinsing until the water runs clear and the surface feels clean rather than slippery.
Step 8: Wipe the Faucet and Edges
Use the damp microfiber cloth to wipe the faucet, handles, sink rim, and surrounding countertop.
These areas can collect water spots and grease even when the main sink basin looks clean.
Step 9: Dry the Sink
Use a clean, dry microfiber cloth to wipe the entire sink.
Drying is an important final step because it removes remaining water droplets and can help reduce water spots.
Buff the surface gently until it looks clean and polished.
Best Tips
Clean the sink regularly instead of waiting until a thick layer of grime has accumulated.
For stainless steel sinks, always use a non-scratch sponge or soft cleaning cloth.
Avoid scrubbing aggressively. Baking soda provides enough gentle abrasion for most everyday buildup.
Dry the sink after cleaning whenever possible. Standing water can leave mineral deposits and water spots.
Clean around the faucet and drain because these areas often collect hidden grime.
If your sink has a brushed stainless steel finish, scrub in the direction of the grain rather than randomly across the surface.
Best Ingredient Options
Baking Soda
Baking soda is the main cleaning ingredient in this method.
It provides gentle abrasive action that helps loosen surface grime and food residue.
Dishwashing Liquid
Choose a regular grease-cutting dishwashing liquid.
A small amount is enough because using too much can make rinsing more difficult.
Warm Water
Warm water helps loosen grease and makes the cleaning process more effective.
Very hot water is not necessary for routine sink cleaning.
Recipe Variations
Baking Soda Cleaning Paste
For stubborn spots, combine baking soda with a small amount of dishwashing liquid until you create a thick paste.
Apply the paste to the affected area.
Let it sit for approximately 5–10 minutes, then gently scrub and rinse thoroughly.
Extra Greasy Sink
For a sink with heavy grease buildup, apply dishwashing liquid first.
Allow it to sit for 2–3 minutes before adding baking soda and scrubbing.
This gives the soap more time to loosen the grease.
Quick Daily Sink Cleaning
For everyday maintenance, use a small amount of dish soap and warm water.
Wipe the sink with a soft sponge, rinse thoroughly, and dry with a microfiber cloth.
This quick routine can prevent heavy buildup from developing.
What to Use With This Cleaning Method
A clean microfiber cloth is one of the most useful tools for finishing the job.
A non-scratch sponge is ideal for the sink basin because it provides enough cleaning power without being unnecessarily abrasive.
An old toothbrush can also be useful for cleaning around the faucet base, drain, and other small areas.
Rubber gloves are optional but can make cleaning more comfortable if you have sensitive hands.
Make-Ahead Instructions
There is no need to prepare this cleaner ahead of time.
The baking soda and dishwashing liquid can be applied directly to the sink when you are ready to clean.
If you want to save time, keep your baking soda, sponge, dish soap, and microfiber cloth together in a small cleaning area.
This makes it easier to complete a quick kitchen sink cleaning routine.
Storage
Keep baking soda in its original container or another tightly closed, dry container.
Store dishwashing liquid according to the manufacturer’s instructions.
Keep cleaning supplies away from children and pets.
Do not store the baking soda mixture in a sealed container for long periods. It is best prepared fresh when needed.
Reheating
This cleaning method does not require reheating.
Always use fresh warm water when cleaning the sink.
Warm water from the faucet is sufficient for loosening everyday grease and residue.
Freezing
The cleaning mixture does not need to be frozen.
Do not freeze dishwashing liquid or prepared baking soda mixtures.
For the best results, simply mix or apply the ingredients fresh each time you clean the sink.
Common Mistakes to Avoid
Using a Harsh Abrasive Sponge
Avoid steel wool, rough scouring pads, or anything that can scratch the sink surface.
A non-scratch sponge is a safer choice for regular cleaning.
Leaving Baking Soda Behind
Baking soda residue can leave the surface looking cloudy.
Always rinse the sink thoroughly after scrubbing.
Forgetting to Dry the Sink
Leaving water sitting on stainless steel can contribute to water spots and mineral deposits.
Use a microfiber cloth to dry the surface after cleaning.
Scrubbing Against the Grain
If you have a brushed stainless steel sink, scrubbing randomly can affect the appearance.
Follow the direction of the grain whenever possible.
Mixing Cleaning Chemicals
Do not combine household cleaning products unless the product labels specifically say they are compatible.
In particular, never mix bleach with ammonia, vinegar, or other incompatible cleaners.
Ignoring the Drain
The drain area can contain food particles and buildup.
Give it extra attention during your regular kitchen cleaning routine.
Nutrition Estimate
| Nutrient | Amount |
| Calories | 0 kcal |
| Protein | 0 g |
| Carbohydrates | 0 g |
| Fat | 0 g |
| Sugar | 0 g |
| Fiber | 0 g |
| Sodium | Not applicable |
This is a household cleaning method and is not intended for consumption.
Frequently Asked Questions
Can I use this method on a stainless steel sink?
Yes. Baking soda and dishwashing liquid can be used for routine cleaning of many stainless steel sinks.
Use a non-scratch sponge and avoid aggressive scrubbing.
How often should I clean my kitchen sink?
For regular maintenance, wipe and rinse the sink daily if possible.
A deeper cleaning with baking soda and dish soap can be done several times per week or whenever visible buildup appears.
Does baking soda remove grease?
Baking soda can help loosen surface grime, while dishwashing liquid is particularly useful for breaking down grease and oily residue.
Using them together can make routine sink cleaning easier.
How do I remove water spots?
Clean the sink thoroughly and dry it completely with a microfiber cloth.
For persistent mineral deposits, use a cleaner specifically labeled as safe for your sink material and follow the manufacturer’s instructions.
Can I use vinegar with baking soda?
Although baking soda and vinegar are commonly used together in household cleaning, they react immediately and largely neutralize each other.
For this method, baking soda and dishwashing liquid are sufficient for routine cleaning.
Can I use this on a porcelain sink?
Check the manufacturer’s care instructions first.
Different sink finishes can react differently to abrasive cleaners, so always use the gentlest method appropriate for the surface.
How can I keep my sink clean longer?
Rinse food particles away after washing dishes, wipe the sink regularly, and dry it after use.
These simple habits can significantly reduce grease, residue, and water spots.
Final Thoughts
A clean kitchen sink can make the entire kitchen feel fresher and more organized.
With baking soda, dishwashing liquid, warm water, a non-scratch sponge, and a microfiber cloth, you can tackle everyday grease, food residue, and surface grime without a complicated cleaning routine.
The key is consistency.
A few minutes of regular cleaning can prevent heavy buildup and make your kitchen sink much easier to maintain.