Introduction
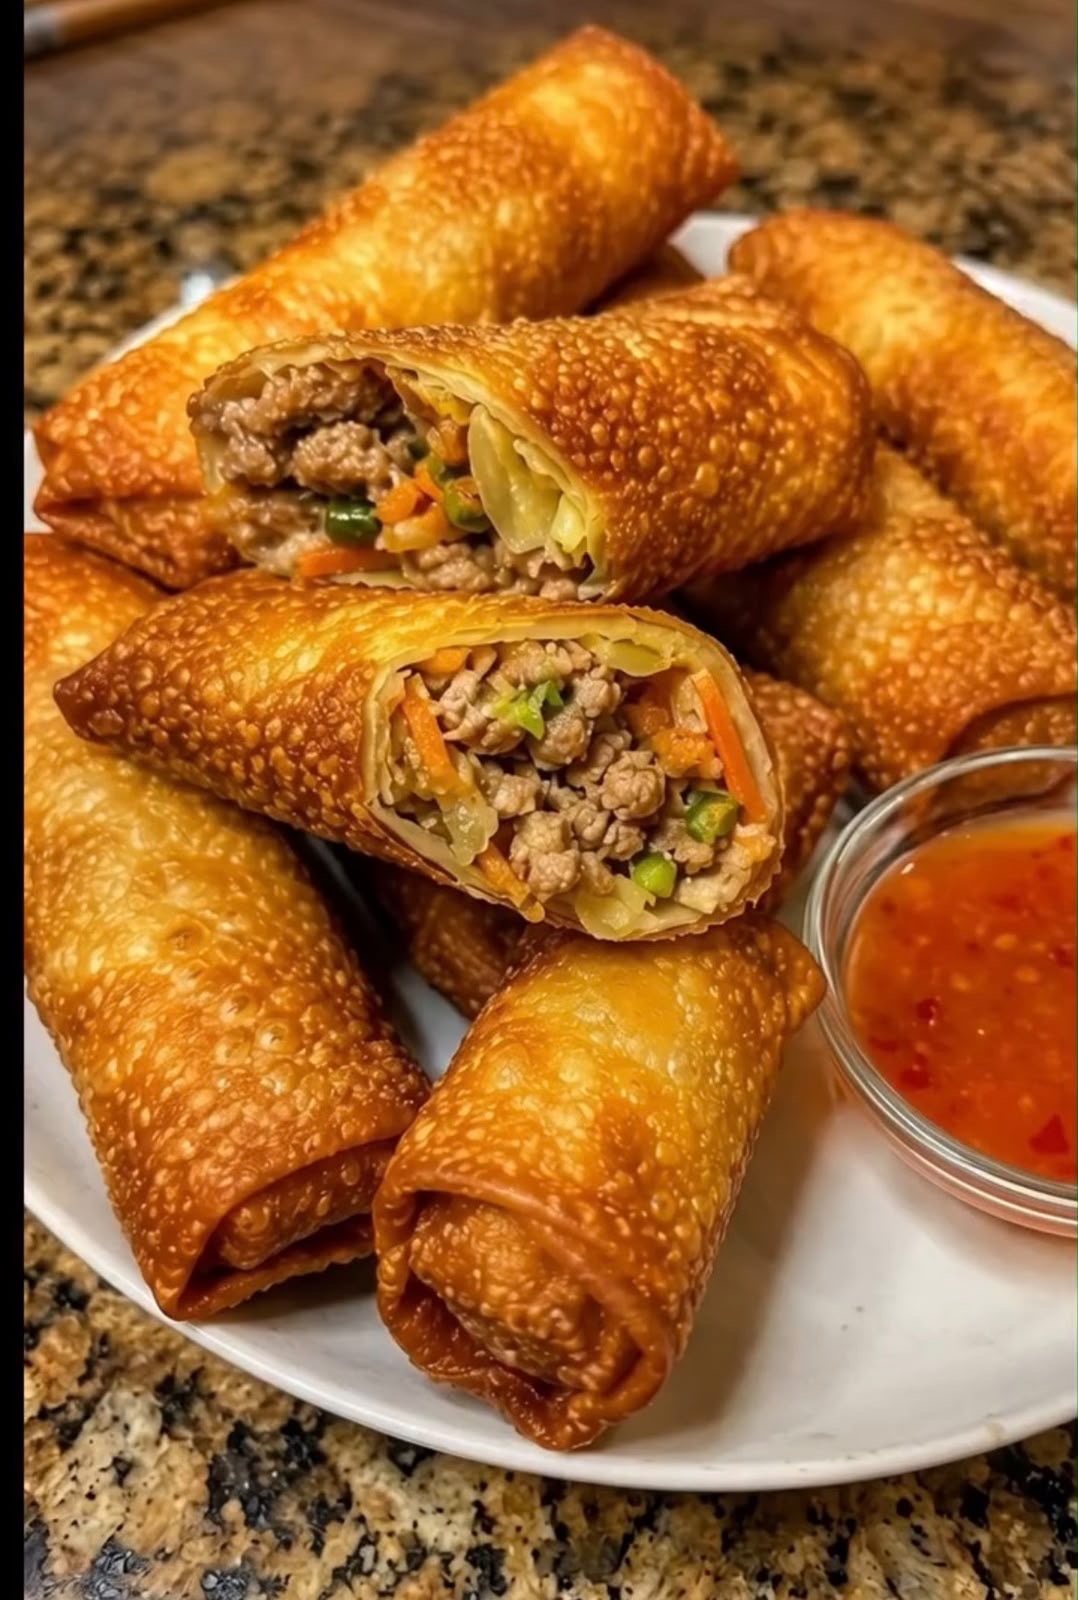
These Crispy Beef Spring Rolls are the perfect combination of a crunchy golden wrapper and a savory, flavorful filling. Each roll is packed with seasoned ground beef, tender vegetables, and aromatic garlic and ginger, then fried until beautifully crisp.
Served with sweet chili sauce for dipping, these homemade beef spring rolls make an excellent appetizer, party snack, game-day food, or easy family favorite.
The filling is simple to prepare, and you can easily customize the vegetables and seasoning to suit your taste. Once fried, the wrappers become wonderfully crisp while the beef and vegetable filling stays juicy and flavorful.
If you love crispy homemade egg rolls, this recipe is definitely worth saving.
Recipe Overview
| Category | Details |
| Recipe Name | Crispy Beef Spring Rolls |
| Preparation Time | 30 minutes |
| Cooking Time | 15–20 minutes |
| Total Time | About 50 minutes |
| Servings | 12–16 spring rolls |
| Difficulty | Easy |
| Cooking Method | Deep frying |
| Main Protein | Ground beef |
| Cuisine | Asian-inspired |
| Texture | Extra crispy outside, juicy inside |
| Best For | Appetizers, parties, snacks, family meals |
Why You’ll Love This Recipe
Extra crispy and golden
The spring roll wrappers become beautifully crisp when fried in properly heated oil, creating the irresistible texture shown in the photo.
Flavorful beef filling
Ground beef is cooked with fresh vegetables, garlic, ginger, and savory seasonings for a delicious filling in every bite.
Easy to customize
You can use cabbage, carrots, onions, bell peppers, green onions, mushrooms, or other vegetables you have available.
Perfect party appetizer
These rolls can be prepared ahead of time and fried just before serving.
Delicious dipping sauce
Serve them with sweet chili sauce, soy-based dipping sauce, spicy mayonnaise, or your favorite Asian-inspired sauce.
Ingredients
For the Beef Filling
| Ingredient | Amount |
| Ground beef | 1 lb (450 g) |
| Green cabbage, finely shredded | 2 cups |
| Carrot, julienned or grated | 1 cup |
| Onion, finely chopped | ½ medium |
| Green bell pepper, finely diced | ½ |
| Garlic, minced | 3 cloves |
| Fresh ginger, grated | 1 tbsp |
| Green onions, sliced | 3 |
| Soy sauce | 2 tbsp |
| Oyster sauce | 1 tbsp |
| Sesame oil | 1 tsp |
| Black pepper | ½ tsp |
| Salt | To taste |
| Vegetable oil | 1 tbsp |
For Rolling
| Ingredient | Amount |
| Spring roll or egg roll wrappers | 12–16 |
| Water | 2 tbsp |
| Cornstarch | 1 tsp |
Mix the water and cornstarch to create a simple sealing paste.
For Frying
| Ingredient | Amount |
| Neutral vegetable oil | 5–6 cups, as needed |
Sunflower, canola, or peanut oil works well for deep frying.
For Serving
| Ingredient | Amount |
| Sweet chili sauce | As desired |
| Soy sauce | Optional |
| Sliced green onions | Optional |
| Fresh cilantro | Optional |
Instructions Step by Step
1. Prepare the Vegetables
Wash and prepare all the vegetables before starting.
Finely shred the cabbage.
Grate or julienne the carrot.
Finely chop the onion and bell pepper.
Mince the garlic and grate the fresh ginger.
Slice the green onions and set everything aside.
Why prepare everything first?
The filling cooks quickly, so having all the ingredients ready makes the cooking process much easier.
2. Brown the Ground Beef
Heat a large skillet or wok over medium-high heat.
Add 1 tablespoon of vegetable oil.
Add the ground beef and cook for approximately 6–8 minutes, breaking it apart with a wooden spoon.
Cook until the beef is thoroughly browned.
If there is a large amount of excess fat, carefully drain it.
3. Add Garlic and Ginger
Add the minced garlic and grated ginger to the beef.
Stir-fry for approximately 30–60 seconds.
Be careful not to burn the garlic.
The garlic and ginger should become fragrant without becoming dark.
4. Add the Vegetables
Add:
- Cabbage
- Carrot
- Onion
- Bell pepper
Stir everything together.
Cook for approximately 4–6 minutes, stirring frequently.
The vegetables should become tender but still retain a little texture.
Avoid overcooking them because they will continue cooking slightly during frying.
5. Season the Filling
Add:
- Soy sauce
- Oyster sauce
- Sesame oil
- Black pepper
Mix thoroughly.
Cook for another 1–2 minutes.
Taste the filling and adjust the seasoning if necessary.
Finally, stir in the sliced green onions.
6. Cool the Filling
This step is very important.
Transfer the beef and vegetable mixture to a wide plate or baking sheet.
Spread it into a thin layer and allow it to cool completely.
Why?
Hot filling can make spring roll wrappers soft and difficult to seal.
A cool, relatively dry filling produces much crispier rolls.
If the filling contains excess liquid, allow it to drain before rolling.
7. Prepare the Wrappers
Place one spring roll wrapper on a clean work surface in a diamond shape.
Keep the remaining wrappers covered with a slightly damp kitchen towel so they don’t dry out.
Place approximately 2–3 tablespoons of filling near the lower third of the wrapper.
Do not overfill.
8. Roll the Spring Rolls
Fold the bottom corner over the filling.
Tuck the filling in gently.
Fold the left and right corners toward the center.
Then roll the spring roll upward tightly.
Brush the final corner with the cornstarch sealing mixture.
Press gently to seal.
Repeat with the remaining wrappers and filling.
9. Heat the Oil
Pour enough oil into a deep saucepan or Dutch oven to allow the spring rolls to fry comfortably.
Heat the oil to approximately 350°F (175°C).
A kitchen thermometer is highly recommended.
No thermometer?
Place a small piece of wrapper into the oil.
It should immediately bubble and rise to the surface.
If it sinks without bubbling, the oil is too cool.
If it becomes dark almost immediately, the oil is too hot.
10. Fry the Beef Spring Rolls
Carefully place a few spring rolls into the hot oil.
Do not overcrowd the pan.
Fry for approximately 3–5 minutes, turning occasionally, until the wrappers become deep golden brown and crispy.
The exact cooking time depends on the size of the rolls and the temperature of the oil.
11. Drain the Spring Rolls
Remove the cooked spring rolls using tongs or a slotted spoon.
Place them on a wire rack set over a baking sheet or on paper towels.
Allow excess oil to drain for a few minutes.
A wire rack is preferable because it allows air to circulate underneath and helps maintain crispiness.
12. Serve
Arrange the crispy beef spring rolls on a serving plate.
Garnish with sliced green onions or fresh cilantro if desired.
Serve immediately with sweet chili sauce.
The contrast between the crunchy wrapper and sweet, slightly spicy dipping sauce is absolutely delicious.
Practical Tips
Keep the filling relatively dry
Excess moisture is one of the biggest enemies of crispy spring rolls.
Cook the vegetables until most of their moisture has evaporated.
Cool the filling completely
Never place piping-hot filling inside the wrappers.
Allowing the filling to cool makes the wrappers easier to handle and helps prevent them from becoming soggy.
Don’t overfill the wrappers
Too much filling can cause the wrappers to split during frying.
Use approximately 2–3 tablespoons per roll, depending on the wrapper size.
Roll tightly
A loose spring roll can absorb more oil and may open while frying.
Roll firmly but without tearing the wrapper.
Maintain the oil temperature
Keep the oil close to 350°F (175°C).
If the temperature drops too much, the spring rolls may become greasy.
If it is too hot, the wrappers can burn before the filling is heated properly.
Best Ingredient Alternatives
| Original Ingredient | Alternative | Notes |
| Ground beef | Ground chicken | Lighter flavor |
| Ground beef | Ground turkey | Leaner option |
| Cabbage | Napa cabbage | More delicate texture |
| Carrot | Shredded zucchini | Adds moisture, so drain well |
| Bell pepper | Mushrooms | More savory flavor |
| Oyster sauce | Hoisin sauce | Slightly sweeter |
| Soy sauce | Tamari | Gluten-free option |
| Fresh ginger | ½ tsp ground ginger | Convenient substitute |
| Green onion | Chives | Mild onion flavor |
| Spring roll wrappers | Egg roll wrappers | Slightly thicker and crispier |
Recipe Variations
Spicy Beef Spring Rolls
Add:
- ½–1 teaspoon chili flakes
- 1 finely chopped chili
- 1 teaspoon chili garlic sauce
For an even hotter version, serve with spicy chili sauce.
Cheesy Beef Spring Rolls
Add a small amount of shredded mozzarella or cheddar to the filling before rolling.
Don’t use too much cheese because excess melted cheese can escape during frying.
Beef and Mushroom Spring Rolls
Add 1 cup finely chopped mushrooms to the filling.
Cook until most of the moisture has evaporated before adding the sauces.
Beef and Shrimp Spring Rolls
Replace part of the ground beef with finely chopped shrimp.
Make sure the shrimp is fully cooked before the filling is placed inside the wrappers.
Vegetable Beef Spring Rolls
Increase the amount of vegetables and add:
- Bean sprouts
- Shredded cabbage
- Carrots
- Bell peppers
- Mushrooms
- Green onions
This creates a colorful and hearty filling.
Accompaniments
These crispy beef rolls pair beautifully with several sauces and sides.
Sweet Chili Sauce
The sweet and spicy flavor provides an excellent contrast to the savory beef filling.
Soy-Garlic Dip
Combine:
- 3 tbsp soy sauce
- 1 tbsp rice vinegar
- 1 tsp sesame oil
- 1 minced garlic clove
- 1 tsp honey
Mix and serve alongside the spring rolls.
Spicy Mayo
Mix mayonnaise with sriracha or another hot sauce for a creamy dipping sauce.
Asian Cucumber Salad
A fresh cucumber salad provides a refreshing contrast to the fried rolls.
Steamed Rice
For a more substantial meal, serve the spring rolls alongside steamed jasmine or basmati rice.
Preparation Ahead of Time
These homemade beef spring rolls are excellent for preparing in advance.
Prepare the filling and allow it to cool completely.
Roll all the spring rolls and place them in a single layer on a parchment-lined baking sheet.
Cover them loosely and refrigerate for several hours before frying.
Avoid stacking uncooked spring rolls directly on top of one another because they may stick together.
For the best texture, fry them shortly before serving.
Storage
Cooked Spring Rolls
Allow the spring rolls to cool completely before storing.
Place them in an airtight container and refrigerate for up to 3 days.
Keep in mind that the wrapper will soften during refrigeration.
Uncooked Spring Rolls
Uncooked rolls are best cooked the same day, although they can be refrigerated for several hours if properly covered.
Reheating
Avoid the microwave if you want to maintain the crispy texture.
Air Fryer
Preheat to 375°F (190°C).
Heat the spring rolls for approximately 4–7 minutes, turning halfway through.
Oven
Preheat to 400°F (200°C).
Place the spring rolls on a wire rack or baking sheet.
Bake for approximately 8–12 minutes, turning halfway through.
Deep Frying
For maximum crispiness, briefly refry refrigerated spring rolls in 350°F (175°C) oil for approximately 1–2 minutes.
Freezing
These beef spring rolls freeze very well.
Freeze Before Frying
Arrange the uncooked spring rolls in a single layer on a parchment-lined baking sheet.
Freeze until firm, approximately 1–2 hours.
Transfer them to a freezer-safe bag or container.
They can be stored for up to 2–3 months.
How to Cook From Frozen
Do not completely thaw them before frying.
Heat the oil to approximately 325–350°F (165–175°C).
Carefully fry the frozen spring rolls until golden brown and heated through, usually around 5–8 minutes, depending on their size.
Avoid overcrowding the pan.
Common Mistakes to Avoid
1. Using hot filling
Hot filling can make the wrapper soft and difficult to roll.
Solution: Cool the filling completely before assembling.
2. Overfilling the spring rolls
Too much filling can cause the wrapper to burst.
Solution: Use a moderate amount of filling and roll tightly.
3. Filling the rolls with watery vegetables
Excess moisture creates steam and can make the wrapper soggy.
Solution: Cook the vegetables until most of their moisture has evaporated.
4. Frying at low temperature
Low-temperature oil causes the wrappers to absorb excessive oil.
Solution: Maintain approximately 350°F (175°C).
5. Overcrowding the pan
Too many rolls at once can dramatically lower the oil temperature.
Solution: Fry in small batches.
6. Not sealing the wrapper properly
A poorly sealed spring roll can open during frying.
Solution: Use a small amount of cornstarch paste and press the final edge firmly closed.
7. Stacking the fried rolls immediately
Steam trapped between the rolls can soften the crispy wrappers.
Solution: Drain them on a wire rack and leave a little space between each roll.
Estimated Nutrition
Nutrition will vary depending on the size of the spring rolls, the amount of oil absorbed, and the exact ingredients used.
| Nutrient | Approx. Per Spring Roll |
| Calories | 170–210 kcal |
| Protein | 7–9 g |
| Carbohydrates | 15–20 g |
| Fat | 8–11 g |
| Saturated Fat | 2–3 g |
| Fiber | 1–2 g |
| Sugar | 1–3 g |
| Sodium | 300–450 mg |
These figures are estimates and should be used only as a general nutritional guide.
Frequently Asked Questions
Can I use ground beef instead of shredded beef?
Yes. Ground beef is actually ideal for this recipe because it cooks quickly and distributes evenly throughout the filling.
Can I make these spring rolls without beef?
Absolutely. You can replace the beef with chicken, turkey, shrimp, mushrooms, tofu, or additional vegetables.
Can I bake these instead of frying?
Yes. Brush or spray the assembled spring rolls lightly with oil and bake at approximately 400°F (200°C) until golden and crispy, turning halfway through.
The baked version will be lighter but may not become quite as blistered and crisp as the deep-fried version.
Can I air fry them?
Yes. Air fry at approximately 375°F (190°C) for around 8–12 minutes, turning halfway through.
Lightly brush the wrappers with oil before cooking.
Why did my spring rolls become soggy?
The most common causes are excess moisture in the filling, oil that was too cool, or stacking the rolls while they were still steaming hot.
Can I prepare these the day before?
Yes. Prepare and refrigerate the filling, then assemble the spring rolls when convenient. You can also assemble the rolls several hours ahead and keep them refrigerated.
What is the best dipping sauce?
Sweet chili sauce is an excellent choice, but you can also serve them with spicy mayo, soy-garlic sauce, hoisin sauce, or a homemade chili-lime dip.
Can I freeze uncooked spring rolls?
Yes. Freezing them before frying is an excellent make-ahead option. Fry them directly from frozen, adjusting the cooking time as necessary.
How do I keep spring rolls crispy?
The most important things are a dry filling, properly heated oil, small frying batches, and good drainage after frying.
Conclusion
These Crispy Beef Spring Rolls are a delicious homemade appetizer with everything you want in a fried snack: a beautifully golden, blistered wrapper and a savory filling packed with seasoned ground beef and crunchy vegetables.
They are easy enough for a casual family meal but impressive enough for parties and entertaining. You can prepare them ahead of time, freeze them for later, or customize the filling with your favorite vegetables and seasonings.
For the crispiest results, remember the key steps: keep the filling dry, cool it completely before rolling, seal the wrappers tightly, and maintain the frying oil at about 350°F (175°C).
Serve them hot with sweet chili sauce and enjoy these irresistible homemade beef spring rolls while they’re at their crispiest.