Welcome to your absolute dream dessert and the ultimate chocolate lover’s paradise.
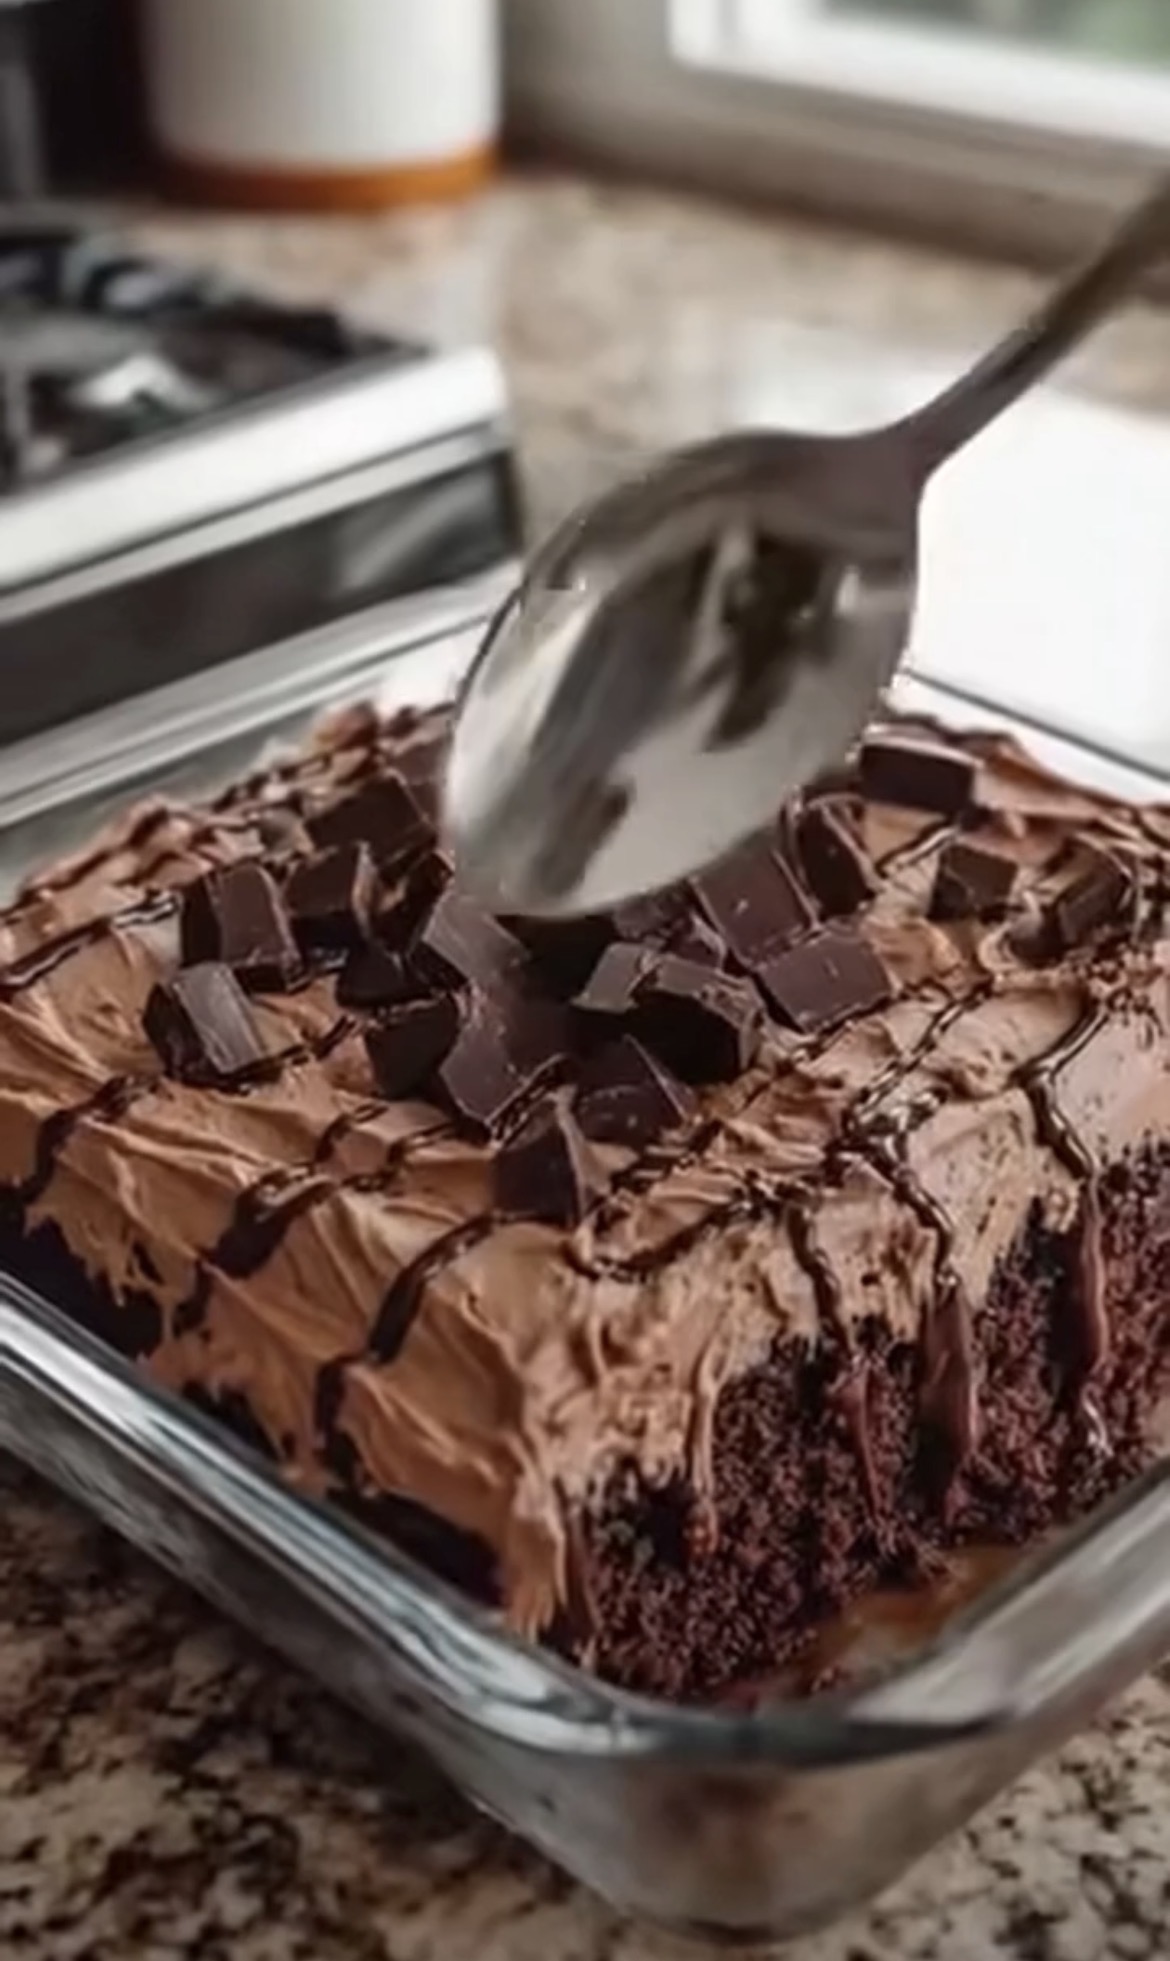
When you look at the incredibly moist crumb and rich toppings in image_4.png, you will instantly crave a massive slice of this homemade chocolate cake.
This phenomenal recipe combines a delightfully soft chocolate base with a thick layer of whipped chocolate buttercream, crunchy chocolate chunks, and a glossy fudge drizzle.
It delivers a premium, bakery-quality experience right in your own kitchen while remaining incredibly simple to prepare from scratch.
Recipe Overview
| Feature | Detail |
| Prep Time | 20 Minutes |
| Cook Time | 35 Minutes |
| Total Time | 55 Minutes |
| Yield | 12 Servings |
| Dietary Profile | Vegetarian |
| Difficulty Level | Beginner-Friendly |
Why You’ll Love This Recipe
This is one of the best easy dessert recipes you can possibly master for weekend entertaining or treating yourself after a long week of healthy meal prep. You can easily achieve an incredibly luxurious, high-end presentation without needing advanced pastry skills or expensive baking equipment.
The brilliant combination of warm, bloomed cocoa powder and rich buttermilk creates a deeply satisfying, ultra-moist crumb that practically melts in your mouth. Each decadent bite offers an amazing textural contrast between the fluffy sponge, the silky smooth buttercream, and the satisfying snap of the chocolate chunks.
Furthermore, this dish is highly versatile and acts as a brilliant make-ahead dessert idea for busy food lovers. You will appreciate how this stunning chocolate fudge cake retains its moisture for days, making it the perfect stress-free sweet treat for any special occasion.
Ingredients
| Cake Batter Ingredients | Quantity | Notes |
| All-Purpose Flour | 1 3/4 cups | Spooned and leveled for accuracy |
| Granulated Sugar | 2 cups | Provides the perfect sweetness and moisture |
| Unsweetened Cocoa Powder | 3/4 cup | High-quality Dutch-processed preferred |
| Baking Soda | 1 1/2 tsp | Essential for a proper rise |
| Salt | 1 tsp | Balances the intense sweetness |
| Large Eggs | 2 | Room temperature |
| Buttermilk | 1 cup | Creates an ultra-tender crumb |
| Vegetable Oil | 1/2 cup | Keeps the cake moist for days |
| Vanilla Extract | 2 tsp | Pure vanilla extract |
| Hot Boiling Water | 1 cup | Blooms the cocoa powder perfectly |
| Whipped Frosting & Toppings | Quantity | Notes |
| Unsalted Butter | 1 cup (226g) | Softened to room temperature |
| Powdered Sugar | 3 cups | Sifted to guarantee a silky texture |
| Cocoa Powder | 1/2 cup | Sifted with the powdered sugar |
| Heavy Cream | 1/4 cup | Use to achieve a fluffy, whipped consistency |
| Vanilla Extract | 1 tsp | Enhances the deep chocolate flavor |
| Semi-Sweet Chocolate Chunks | 1 cup | Roughly chopped for the topping |
| Chocolate Fudge Syrup | 1/4 cup | For the final decorative drizzle |
Step-by-Step Instructions
Step 1: Preheat and Prep Preheat your oven to exactly 175°C (350°F). Generously grease a 9×13 inch glass baking dish with non-stick baking spray or a light coating of butter to ensure easy serving.
Step 2: Combine the Dry Ingredients In a large mixing bowl, whisk together the all-purpose flour, granulated sugar, unsweetened cocoa powder, baking soda, and salt. Ensure the cocoa powder is fully incorporated and free of any large lumps.
Step 3: Mix the Wet Ingredients In a separate medium bowl, whisk the room temperature eggs, buttermilk, vegetable oil, and vanilla extract until completely smooth and cohesive.
Step 4: Form the Batter Base Pour the wet buttermilk mixture directly into the bowl with your dry ingredients. Mix gently with a wooden spoon or silicone spatula on low speed until just combined, being careful not to overmix.
Step 5: Bloom the Cocoa Carefully and slowly pour the hot boiling water into the batter. Whisk gently until the batter is completely smooth. The batter will seem very thin and watery at this stage, but this is exactly how it should look for a highly moist cake.
Step 6: Bake the Cake Pour the thin chocolate batter into your prepared glass baking dish. Bake in the center of the preheated oven for 30 to 35 minutes, or until a wooden toothpick inserted into the center comes out perfectly clean.
Step 7: Cool Completely Remove the glass dish from the oven and set it on a wire cooling rack. You must allow the cake to cool completely to room temperature before attempting to add the frosting, which usually takes about two hours.
Step 8: Whip the Frosting While the cake cools, beat the softened unsalted butter in a large bowl on medium-high speed for 2 minutes until pale and creamy. Gradually add the sifted powdered sugar and cocoa powder, alternating with the heavy cream and vanilla extract. Whip for an additional 3 minutes until light and extremely fluffy.
Step 9: Assemble and Garnish Spread the fluffy chocolate buttercream evenly over the completely cooled cake using a spatula, creating lovely swirls. Generously scatter the chocolate chunks over the frosting, then finish by drizzling the glossy chocolate fudge syrup across the entire surface.
Best Tips
To achieve the absolute best chocolate flavor, consider swapping the plain hot water for a cup of freshly brewed, piping hot dark roast coffee. The bitter notes in the hot espresso or coffee heavily enhance and deepen the cocoa profile without making the cake taste like coffee.
Always make sure your dairy ingredients, specifically the eggs and the buttermilk, are brought completely to room temperature before you begin mixing. Room temperature ingredients bond together much more easily, trapping necessary air bubbles that yield a lighter, fluffier sponge.
Do not rush the cooling process under any circumstances before applying your homemade buttercream. If the glass pan or the cake holds even a slight amount of residual heat, it will instantly melt the butter in your frosting, leaving you with an oily, unappealing liquid mess.
Best Ingredient Options
Opting for premium, high-fat Dutch-processed cocoa powder will drastically improve the color and taste of this dish. It provides a darker, smoother, and much less acidic flavor profile than standard natural cocoa powder.
For the frosting, using real, high-quality unsalted butter is absolutely essential for a professional texture. Margarine or butter substitutes contain too much water and will prevent your frosting from whipping into that desired, cloud-like consistency.
Recipe Variations
If you want to elevate this into an exciting turtle chocolate cake, you can easily drizzle a thick, rich caramel sauce over the frosting alongside the chocolate syrup. Adding a handful of toasted chopped pecans will perfectly complete this delicious, highly requested variation.
For a beautiful contrast in flavor and visual appeal, consider substituting the chocolate buttercream with a tangy, fluffy cream cheese frosting. The slight tartness of the cream cheese cuts through the intense sweetness of the fudge base beautifully.
You can also experiment with the toppings to suit your family’s preferences by swapping the semi-sweet chunks for peanut butter chips, crushed toffee bits, or even a dusting of crushed peppermint candies during the winter holidays.
What to Serve With
This deeply rich and decadent dessert pairs flawlessly with an ice-cold glass of whole milk or a steaming mug of unsweetened black coffee. The simple, unsweetened beverages act as the perfect palate cleanser for the intensely sweet chocolate layers.
If you are hosting a formal dinner party or a birthday celebration, serving a generous square alongside a massive scoop of premium vanilla bean ice cream is a fantastic choice. The contrasting temperatures and creamy vanilla notes make for a truly unforgettable dessert experience.
A small cluster of fresh raspberries or sliced strawberries also makes a highly elegant and refreshing side garnish. The bright, natural acidity of the fresh fruit provides a beautiful flavor contrast to the heavy, fudgy icing.
Make-Ahead Instructions
You can easily bake the chocolate sponge a day in advance to save significant time on the day of your event. Allow the baked cake to cool completely, then tightly wrap the glass dish in plastic wrap and store it at room temperature overnight.
You can also prepare the whipped chocolate buttercream up to two days ahead of time and store it in an airtight container in the refrigerator. When you are ready to assemble, simply let the frosting sit at room temperature for thirty minutes and briefly re-whip it to restore its fluffy texture.
Storage
Keep any remaining portions of the frosted cake tightly sealed in its original glass baking dish using a high-quality plastic wrap or a fitted silicone lid.
Store the dish safely at room temperature for up to 3 days, or place it in the refrigerator for up to 5 days to maximize freshness.
If stored in the refrigerator, allow individual slices to sit on the counter for about 15 minutes before eating, as cold temperatures cause the butter-based frosting to harden.
Reheating
While this cake is primarily enjoyed at room temperature, some people highly prefer their chocolate desserts slightly warm and gooey.
To gently reheat, place a single slice on a microwave-safe plate and microwave it on medium power for strictly 10 to 12 seconds.
Do not overheat the slice, or the whipped buttercream frosting will completely melt and slide off the sponge.
Freezing
This chocolate cake recipe freezes exceptionally well, making it a wonderful solution for long-term meal planning and reducing food waste.
For the best results, flash-freeze individual frosted slices on a parchment-lined baking sheet for one hour until the frosting is completely firm to the touch.
Once firm, wrap each individual slice tightly in plastic wrap followed by aluminum foil, and freeze for up to 3 months. Thaw slices overnight in the refrigerator before unwrapping and enjoying.
Common Mistakes to Avoid
One of the most frequent baking errors is improperly measuring the all-purpose flour by violently scooping it directly out of the bag. You must spoon the flour gently into your measuring cup and level it off with a knife to avoid packing too much flour, which will result in a dry, dense cake.
Another major mistake is overmixing the cake batter once the wet and dry ingredients are combined. Overmixing aggressively develops the gluten in the flour, turning what should be a tender, delicate sponge into a tough and chewy dessert.
Finally, completely avoid opening the oven door during the first 25 minutes of the baking process. Letting sudden drafts of cool air into the oven will cause the center of your beautiful chocolate cake to rapidly sink and collapse.
Nutrition Estimate
| Nutrient | Amount per Serving |
| Calories | 560 kcal |
| Protein | 5 g |
| Total Fat | 31 g |
| Carbohydrates | 72 g |
| Sodium | 380 mg |
Frequently Asked Questions
Can I substitute the buttermilk if I don’t have any on hand? Yes, you can easily make a highly effective homemade buttermilk substitute. Simply stir one tablespoon of white vinegar or fresh lemon juice into one cup of regular whole milk and let it sit for five minutes to curdle before using.
Why did my chocolate chips sink to the bottom of the batter? This recipe relies on sprinkling the chocolate chunks entirely over the frosting after baking, rather than mixing them into the batter. If you choose to add mix-ins to the very thin, watery batter, they will unfortunately sink to the bottom of the glass dish during baking.
Can I bake this recipe in round cake pans instead? Absolutely. You can divide this exact batter evenly between two greased 8-inch or 9-inch round cake pans. However, you will need to reduce the baking time to approximately 25 to 28 minutes, so keep a close eye on them.
Final Thoughts
Mastering this ultimate triple chocolate fudge cake will completely revolutionize your approach to homemade sweet treats.
It provides the perfect balance of rich, gourmet flavor profiles and straightforward, everyday baking convenience.
Enjoy treating yourself and your loved ones to this spectacular, intensely satisfying culinary creation tonight.