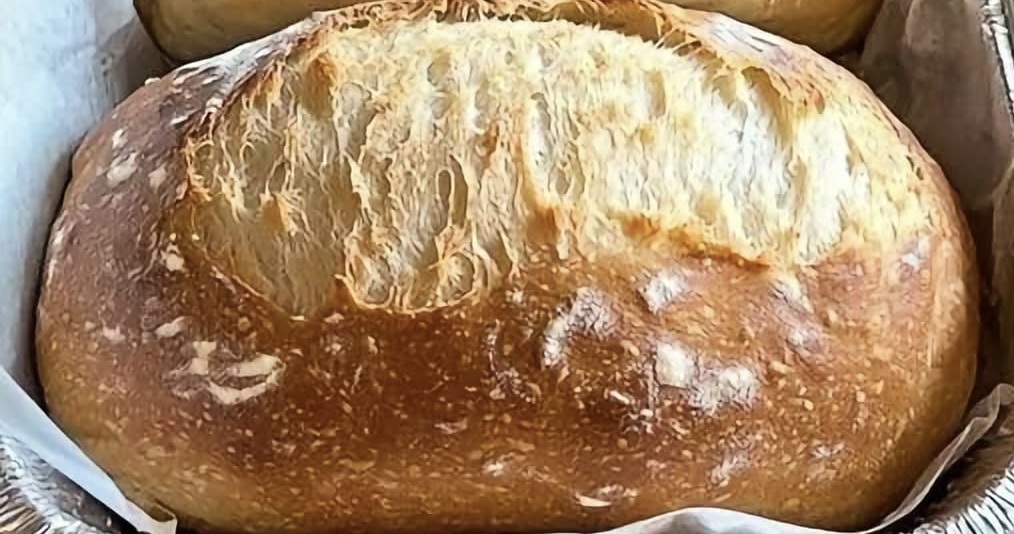
There’s nothing quite like the aroma of freshly baked artisan bread filling your kitchen. If you’ve always dreamed of making bakery-style bread at home but don’t own a Dutch oven, this recipe is exactly what you need. As shown in the image, you can bake two beautiful, golden artisan loaves using nothing more than an aluminum roasting pan lined with parchment paper. The result is a crisp, crackly crust with a soft, airy interior that rivals your favorite bakery.
This easy no-knead artisan bread recipe is perfect for beginners and experienced bakers alike. With just four pantry staples, minimal hands-on work, and a simple baking method, you’ll enjoy homemade crusty bread that’s perfect for sandwiches, soups, breakfast, or simply served warm with butter.
Recipe Overview
| Recipe | Easy Crusty Artisan Bread |
| Category | Bread |
| Cuisine | American / European |
| Prep Time | 15 minutes |
| First Rise | 2 hours |
| Second Rise | 45 minutes |
| Bake Time | 35–45 minutes |
| Total Time | About 3 hours |
| Yield | 2 Artisan Loaves |
| Difficulty | Beginner |
Why You’ll Love This Recipe
This homemade artisan bread recipe delivers bakery-quality results without expensive baking equipment. Instead of using a Dutch oven, a simple disposable aluminum roasting pan helps create the steam needed for a beautifully crisp crust.
Because this is a no-knead bread recipe, you don’t need a stand mixer or advanced bread-making skills. Time does most of the work while the dough develops incredible flavor and texture.
The crust becomes beautifully golden and crispy, while the inside stays soft, chewy, and full of airy pockets that artisan bread is famous for.
With only four basic pantry ingredients, this easy bread recipe is budget-friendly and ideal for beginner bakers looking for reliable homemade bread every time.
Ingredients
Main Ingredients
| Ingredient | US Amount | Metric |
| Bread Flour | 6½ cups | 780 g |
| Warm Water (95–105°F) | 3 cups | 710 ml |
| Active Dry Yeast | 1 tablespoon | 10 g |
| Kosher Salt | 1½ tablespoons | 22 g |
Equipment
| Equipment | Purpose |
| Large Mixing Bowl | Mixing dough |
| Wooden Spoon | Stirring dough |
| Aluminum Roasting Pan | Baking |
| Parchment Paper | Prevents sticking |
| Cooling Rack | Cooling bread |
| Bread Lame or Sharp Knife | Scoring dough |
Step-by-Step Instructions
In a large mixing bowl, combine the warm water and active dry yeast. Allow the yeast to activate for 5–10 minutes until it becomes foamy.
Add the bread flour and kosher salt to the bowl. Stir with a wooden spoon until a shaggy, sticky dough forms. Continue mixing until no dry flour remains. Avoid overmixing.
Cover the bowl with plastic wrap or a damp kitchen towel. Let the dough rise at room temperature (about 70°F / 21°C) for approximately 2 hours or until doubled in size.
Lightly flour your countertop. Turn the dough out and divide it into two equal portions. Shape each piece gently into an oval loaf without pressing out the air bubbles.
Line an aluminum roasting pan with parchment paper and place both loaves inside, leaving some space between them.
Cover loosely and allow the loaves to rise for another 45 minutes.
Meanwhile, preheat the oven to 450°F (230°C).
Use a sharp knife or bread lame to score one long slash across the top of each loaf.
Bake for 35–45 minutes, until the crust is deeply golden brown and the bread sounds hollow when tapped on the bottom.
Transfer the loaves to a wire rack and allow them to cool completely for at least one hour before slicing.
Best Tips
Using a digital kitchen scale provides the most accurate measurements and produces consistently excellent bread.
Resist the temptation to add extra flour. Sticky dough creates the open crumb and chewy texture artisan bread is known for.
For extra steam, place a small metal pan on the lower oven rack and carefully add a few ice cubes or a small amount of hot water to that pan when you place the bread in the oven. Avoid placing ice directly on the oven floor, as this is not recommended for some ovens.
Always allow the bread to cool completely before slicing so the crumb finishes setting properly.
Best Ingredient Alternatives
| Original Ingredient | Best Substitute |
| Bread Flour | Unbleached All-Purpose Flour |
| Active Dry Yeast | Instant Yeast |
| Kosher Salt | Fine Sea Salt |
| Warm Water | Filtered Water |
Recipe Variations
Roasted garlic and fresh rosemary create a wonderfully aromatic artisan loaf that’s perfect for serving alongside pasta or roasted meats.
Sharp cheddar cheese combined with diced jalapeños transforms this bread into a flavorful option for sandwiches and burgers.
Kalamata olives and fresh thyme add Mediterranean flavors that pair beautifully with olive oil and cheeses.
Everything bagel seasoning sprinkled over the dough before baking gives the crust extra texture and savory flavor.
Dried cranberries and chopped walnuts create a rustic loaf perfect for breakfast or holiday gatherings.
What to Serve With
Fresh artisan bread is delicious served with salted butter, extra virgin olive oil, or herb-infused dipping oil.
Pair it with creamy tomato soup, French onion soup, beef stew, or homemade chili for a comforting meal.
It also complements charcuterie boards featuring artisan cheeses, cured meats, olives, nuts, and fruit preserves.
Slice and toast it for avocado toast, gourmet sandwiches, or homemade garlic bread.
Serve alongside pasta dishes, roasted chicken, grilled steak, or seafood for a complete dinner.
Make-Ahead Instructions
Prepare the dough one day ahead and refrigerate it after mixing for 12–48 hours. This slow fermentation develops deeper flavor and improves the bread’s texture.
Allow the chilled dough to warm slightly before shaping and completing the second rise.
Storage
Store cooled bread in a paper bag, bread box, or loosely wrapped in a clean kitchen towel for up to three days at room temperature.
Avoid refrigerating the bread because refrigeration causes it to stale more quickly.
Reheating
To refresh the crust, lightly mist the loaf with water and warm it in a 350°F (175°C) oven for 5–10 minutes.
Freezing
Allow the bread to cool completely before freezing.
Wrap tightly in plastic wrap followed by aluminum foil or place inside a freezer-safe bag.
Freeze for up to 3 months.
Thaw at room temperature before reheating.
Common Mistakes to Avoid
Cutting into the bread before it has cooled causes the crumb to become gummy instead of light and airy.
Using water that is too hot may kill the yeast and prevent proper rising.
Adding too much flour during shaping creates heavy, dense bread.
Over-proofing the dough weakens its structure and produces flat loaves.
Skipping the scoring step can cause the bread to crack unevenly while baking.
Nutrition Estimate
| Nutrient | Amount Per Slice |
| Calories | 120 |
| Carbohydrates | 25 g |
| Protein | 4 g |
| Fat | 0.5 g |
| Fiber | 1 g |
| Sugar | 0 g |
| Sodium | 290 mg |
| Potassium | 45 mg |
Frequently Asked Questions
Can I use all-purpose flour?
Yes. Bread flour gives a chewier texture, but all-purpose flour works very well for this recipe.
Why didn’t my bread rise?
Inactive yeast, overly hot water, or insufficient proofing time are the most common reasons.
Can I bake one loaf instead of two?
Absolutely. Simply halve the ingredients or bake the second loaf later.
Do I really need parchment paper?
Yes. It prevents sticking and makes transferring the loaves much easier.
How do I know when the bread is fully baked?
The crust should be deep golden brown, and the loaf should sound hollow when tapped on the bottom. An internal temperature of 200–210°F (93–99°C) indicates it is fully baked.
Final Thoughts
This easy crusty artisan bread recipe proves that you don’t need a Dutch oven to bake beautiful homemade bread with a crisp crust and soft, airy crumb. Using simple pantry ingredients and an aluminum roasting pan, you can create bakery-style loaves that are perfect for everyday meals, sandwiches, soups, or entertaining guests. Once you’ve mastered this foolproof recipe, experiment with herbs, cheese, olives, or roasted garlic to make it your own. Fresh homemade artisan bread has never been easier—or more delicious.