Chocolate Coconut Milk Jelly Recipe
Chocolate Coconut Milk Jelly is a delightful and refreshing dessert that combines the rich flavors of chocolate with the smooth, tropical taste of coconut milk.
This dessert is not only easy to make but also vegan-friendly, making it a perfect treat for everyone to enjoy.
The creamy texture of coconut milk pairs beautifully with the richness of chocolate, while the jelly adds a satisfying firmness, making each bite a delicious experience.
Ingredients
1 can of full-fat coconut milk
100g dark chocolate (at least 70% cocoa)
2 tablespoons agar-agar powder
2 tablespoons maple syrup (or sweetener of your choice)
1 teaspoon vanilla extract
Pinch of salt
Water (for dissolving agar-agar)
Instructions
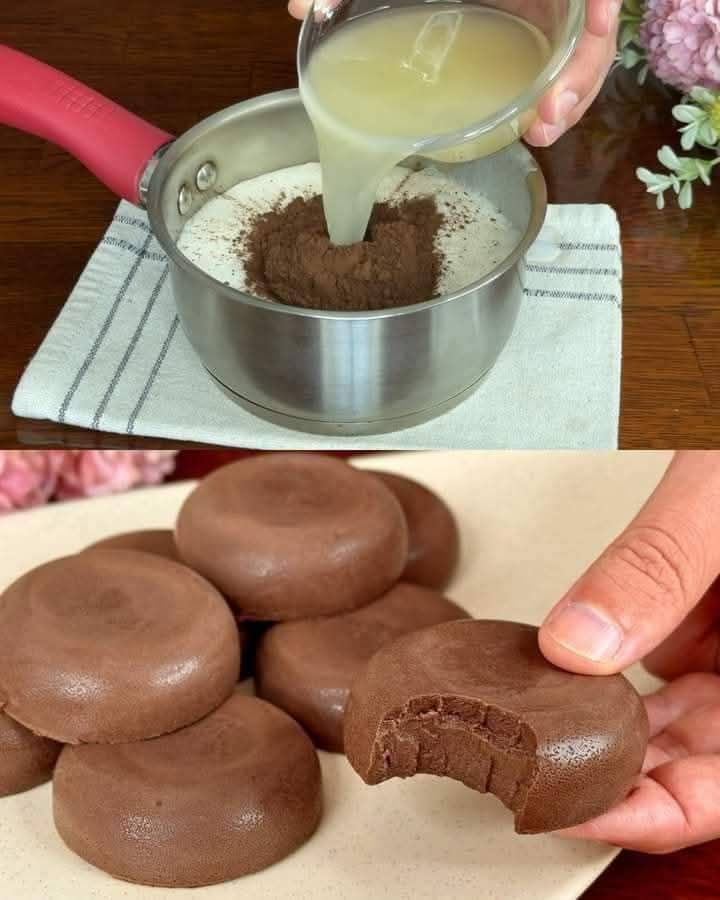
Start by preparing your ingredients. Chop the dark chocolate into small pieces to ensure it melts quickly and evenly when added to the coconut milk. In a small saucepan.
dissolve the agar-agar powder in 1/4 cup of water. Stir it well to ensure there are no lumps, and then bring it to a gentle boil over medium heat. Let it simmer for a few minutes until fully dissolved.
While the agar-agar mixture is heating, place the coconut milk into a medium saucepan over low heat.
Add the chopped chocolate to the coconut milk and stir constantly until the chocolate has fully melted into the coconut milk.
creating a smooth and creamy mixture. Add in the maple syrup, vanilla extract, and a pinch of salt, mixing everything together.
Once the agar-agar mixture has fully dissolved, pour it into the chocolate-coconut milk mixture. Stir the mixture well to ensure the agar-agar is evenly distributed throughout.
Continue heating the mixture gently for another 2-3 minutes, allowing all the flavors to meld together. Do not allow it to boil rapidly.
Now, remove the saucepan from the heat and pour the mixture into molds of your choice. Silicone molds work well, but any shallow dish will work fine too.
Make sure to allow the mixture to cool slightly before transferring it to the refrigerator. Place the molds in the fridge for at least 2-3 hours to allow the jelly to set.
Once the jelly has set and become firm, carefully remove it from the molds. If you used a shallow dish.
cut the jelly into squares or any shape you prefer. The chocolate coconut milk jelly is now ready to be enjoyed!
For a little extra flair, serve the jelly with a dollop of coconut whipped cream or some fresh berries. This dessert pairs beautifully with a cup of coffee or as a refreshing end to a light meal.
How to Make
To make Chocolate Coconut Milk Jelly, start by dissolving the agar-agar in water. This step is crucial for ensuring that your jelly has the right texture.
Agar-agar acts as a plant-based gelatin, so it needs to be fully dissolved and boiled to activate its gelling properties.
Once your agar-agar mixture is ready, combine it with the coconut milk and chocolate in a saucepan.
The key here is to keep the heat low and stir constantly. The chocolate will melt slowly and evenly.
creating a smooth and creamy base. Don’t rush this step, as you want all the chocolate to dissolve perfectly into the coconut milk.
As you mix in the maple syrup and vanilla extract, keep an eye on the consistency of the mixture.
The combination of coconut milk and chocolate should be velvety and thick, but not overly dense.
The sweetness from the maple syrup will enhance the flavors of the chocolate without overpowering the natural richness of the coconut milk.
After the agar-agar is fully dissolved and incorporated, pour the mixture into molds or dishes. Be careful when handling the hot mixture to avoid burns.
Once in the molds, the jelly will need a few hours in the fridge to set. Make sure it has completely cooled before refrigerating.
Agar-agar sets the jelly without the need for refrigeration, but chilling it helps it firm up even more and ensures the perfect texture.
It also enhances the flavor as the chocolate and coconut milk mixture blends and solidifies into a rich, creamy jelly.
As the jelly sets in the refrigerator, you’ll notice it firm up gradually. The end result should be a firm but not rubbery jelly that holds its shape well when removed from the molds.
You’ll know it’s ready when it feels solid and slightly springy to the touch.
Once fully set, you can serve the jelly immediately or keep it chilled until ready to enjoy. It makes for a refreshing treat on a warm day or as a dessert after a hearty meal.
Variations
There are many ways you can personalize this Chocolate Coconut Milk Jelly recipe to suit your preferences. If you prefer a different flavor profile.
try infusing the coconut milk with spices like cinnamon or cardamom before adding the chocolate.
This will give the jelly a unique, spiced undertone that pairs wonderfully with the sweetness of the chocolate.
For those who like a bit of texture, consider adding crushed nuts or toasted coconut flakes to the jelly.
These additions will not only enhance the flavor but also provide a satisfying crunch that complements the smooth jelly.
You can fold them into the mixture just before pouring it into molds.
If you’re not a fan of dark chocolate, you can easily swap it for milk chocolate or even white chocolate.
Each variety will bring a different sweetness and richness to the jelly. Experiment with different types of chocolate to find the one that best suits your taste.
For a fruitier twist, try adding a layer of fruit puree, such as raspberry or mango, at the bottom of the molds before pouring in the chocolate coconut mixture.
Once the jelly has set, you’ll have a beautiful and flavorful surprise at the center of each bite.
If you want to make the dessert even richer, consider adding a tablespoon of peanut butter or almond butter into the coconut milk mixture.
This will give the jelly a nutty creaminess that pairs wonderfully with chocolate.
You can also make the jelly less sweet by reducing the amount of maple syrup. If you’re following a low-sugar or keto diet.
you can substitute the syrup with a low-carb sweetener like stevia or erythritol, adjusting to taste.
For a more decadent dessert, try serving the jelly with a chocolate ganache drizzle or a dusting of cocoa powder.
This will take your chocolate coconut milk jelly to the next level, making it feel more indulgent and refined.
Tips
When dissolving the agar-agar, make sure you stir it constantly to prevent clumping. Agar-agar requires boiling to activate its gelling properties.
so be patient and let it simmer for a few minutes before adding it to the coconut milk mixture.
If you prefer a softer jelly, you can reduce the amount of agar-agar slightly. The more agar-agar you use, the firmer the jelly will be, so adjust to your preference for texture.
Always make sure that the chocolate is fully melted into the coconut milk before adding the agar-agar mixture.
This ensures that the jelly has a smooth and uniform texture without any lumps of chocolate.
For the best flavor, use high-quality dark chocolate. The chocolate is the star ingredient in this recipe, and the quality of the chocolate will significantly affect the taste and richness of the jelly.
To avoid overheating the coconut milk and chocolate mixture, keep the heat low. Stirring constantly ensures that the chocolate melts evenly and prevents it from burning or seizing.
If you’re in a rush, you can speed up the setting process by placing the molds in the freezer instead of the refrigerator.
However, be sure to check the jelly frequently to prevent it from freezing solid.
For a clean release from molds, you can lightly grease them with coconut oil before pouring in the jelly mixture. This helps the jelly slide out easily once it has set.
Conclusion
Chocolate Coconut Milk Jelly is a simple yet indulgent dessert that brings together two beloved flavors in a fun and unique way.
Its rich, creamy texture and satisfying chocolate flavor make it a perfect treat for any occasion.
Whether enjoyed on its own or paired with fresh fruit or whipped cream, this jelly is sure to impress.
The recipe is easily customizable to suit various tastes and preferences, making it a versatile dessert that everyone will love.