Introduction
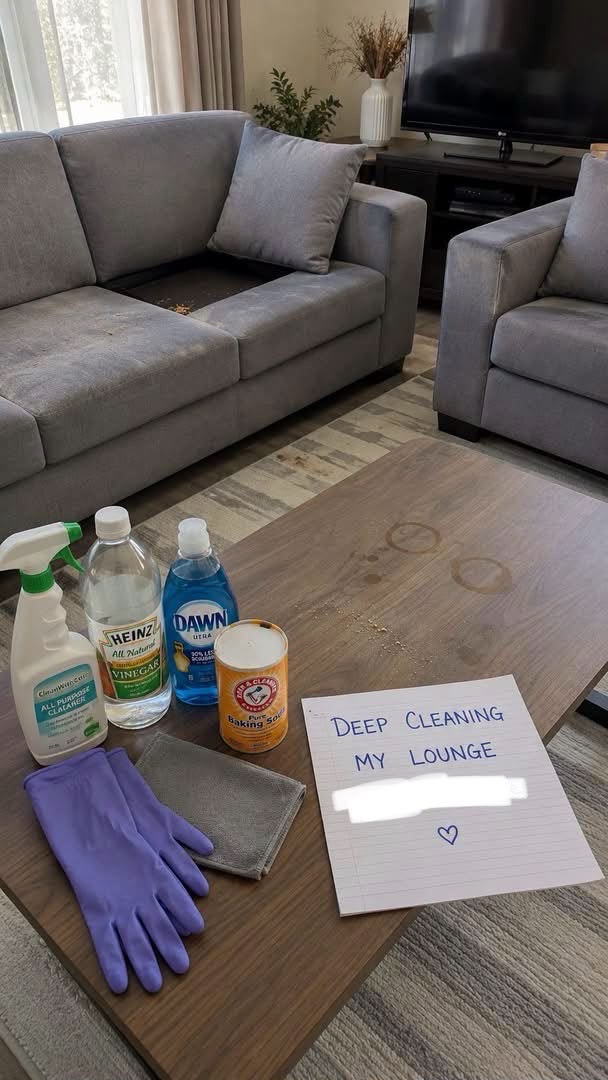
A fresh, spotless living room can completely transform the feeling of your home. This DIY deep cleaning lounge refresh combines simple household supplies with an organized cleaning routine to tackle dust, crumbs, odors, upholstery stains, and everyday grime.
Whether you’re preparing your home for guests, completing a seasonal deep clean, or simply wanting your living room to feel fresh again, this beginner-friendly cleaning routine makes the process manageable and affordable.
The key is to work from top to bottom, clean dry debris before introducing moisture, and always use products appropriate for the specific material you’re cleaning.
Recipe Overview
| Feature | Details |
| Prep Time | 10 minutes |
| Active Cleaning Time | 45 minutes |
| Drying Time | 20–30 minutes |
| Total Time | About 1 hour 15 minutes |
| Yield | 1 refreshed lounge |
| Difficulty | Beginner-Friendly |
Why You’ll Love This Recipe
This deep cleaning routine is inexpensive, practical, and easy to customize according to the surfaces and fabrics in your living room.
It helps remove hidden crumbs, dust, pet hair, everyday grime, and unpleasant upholstery odors without requiring an entire collection of specialized cleaning products.
The biggest advantage is the organized approach. Instead of randomly cleaning different areas, you work systematically through the furniture, upholstery, hard surfaces, and floor.
A refreshed living room can also make your entire home feel cleaner and more inviting, making this routine particularly useful before guests arrive or during a seasonal home reset.
Ingredients
🧴 DIY Cleaning Solution
| Ingredient | Quantity | Notes |
| Warm Water | 2 cups | Lukewarm or comfortably warm |
| Mild Dish Soap | 1 teaspoon | Use a small amount to avoid residue |
| White Vinegar | 1 tablespoon | Suitable for some washable hard surfaces; avoid delicate stone and unsealed wood |
| Baking Soda | ½ cup | For dry deodorizing of suitable upholstery |
| Commercial All-Purpose Cleaner | As needed | Choose one appropriate for the surface |
🧤 Cleaning Equipment
| Tool | Quantity | Purpose |
| Rubber Cleaning Gloves | 1 pair | Protects hands |
| Microfiber Cloths | 3–4 | Dusting, wiping, and drying |
| Spray Bottle | 1 | For the diluted cleaning solution |
| Vacuum Cleaner | 1 | Floors and upholstery |
| Upholstery Attachment | 1 | Cleaning sofa cushions |
| Crevice Tool | 1 | Reaching sofa gaps |
| Soft Cleaning Brush | 1 | Gentle spot cleaning |
| Small Bowl | 1 | For upholstery spot-treatment solution |
Important: Never mix vinegar with bleach, ammonia, or other incompatible cleaning products. Also avoid using vinegar on marble, limestone, granite surfaces that are sensitive to acids, and other acid-sensitive materials.
Step-by-Step Instructions
1. Clear the Lounge
Start by removing decorative objects, blankets, cushions, magazines, toys, and unnecessary items from the coffee table and sofa.
Place removable items in their appropriate locations rather than simply moving them to another surface.
This gives you a completely clear workspace and makes hidden dirt much easier to identify.
2. Vacuum the Sofa Thoroughly
Remove the sofa cushions and vacuum underneath them using the crevice attachment.
Pay special attention to seams, corners, underneath cushions, and the gap between the sofa and floor.
Use the upholstery attachment over the cushions and fabric surfaces to collect dust, crumbs, hair, and loose debris.
Vacuuming before using any liquid cleaner is important because moisture can make loose dirt harder to remove.
3. Prepare the Mild Cleaning Solution
Add 2 cups of warm water and 1 teaspoon of mild dish soap to a clean spray bottle.
If you are cleaning a compatible, sealed hard surface, you can add 1 tablespoon of white vinegar.
Close the bottle and gently swirl it rather than shaking vigorously.
For upholstery, check the manufacturer’s care label first. Some fabrics should only be cleaned with specific products or by professional cleaners.
4. Spot-Test Before Cleaning
Before treating any visible stain, test your chosen cleaning solution on a small, hidden section of the material.
Apply a tiny amount and wait for the area to dry.
Check for discoloration, bleeding, texture changes, or damage before continuing.
This simple step can prevent an otherwise avoidable furniture-cleaning disaster.
5. Treat Upholstery Stains
For washable upholstery that is compatible with your cleaning solution, lightly dampen a microfiber cloth rather than soaking the sofa.
Gently blot the stained area from the outside toward the center.
Avoid aggressive scrubbing because excessive friction can damage fibers or spread the stain.
Use a second clean, slightly damp cloth to remove excess soap residue, then allow the fabric to dry completely.
6. Deodorize the Sofa
Once the upholstery is completely dry, lightly sprinkle baking soda over suitable fabric surfaces.
Leave it for approximately 20–30 minutes.
Baking soda can help absorb everyday odors from compatible upholstery.
Afterward, vacuum thoroughly using the upholstery attachment.
Important: Check the furniture manufacturer’s cleaning instructions before using baking soda. Avoid using loose powders on fabrics where the manufacturer recommends against them.
7. Clean the Coffee Table
Remove dust and crumbs with a dry microfiber cloth first.
For a finished wooden coffee table, use a cleaner specifically designed for the furniture’s finish whenever possible.
Do not automatically use vinegar or abrasive baking soda paste on wood. These can damage certain finishes, dull the surface, or create scratches.
For water rings, first follow the furniture manufacturer’s care instructions. Persistent white rings may require a finish-specific wood treatment rather than an aggressive DIY mixture.
8. Wipe Down Hard Surfaces
Use an appropriate all-purpose cleaner on compatible hard surfaces around the lounge.
Wipe shelves, side tables, cabinet fronts, handles, and other frequently touched areas.
Work systematically so that you don’t accidentally re-contaminate areas you’ve already cleaned.
9. Clean the Floor
Vacuum the entire floor, moving furniture where practical so you can reach underneath and around it.
For hard flooring, use a cleaning product appropriate for the specific flooring material.
Avoid excessive water on hardwood and other moisture-sensitive flooring.
10. Finish and Reset the Room
Allow freshly cleaned upholstery and surfaces to dry completely.
Replace the sofa cushions, arrange the throw pillows, return decorative objects to the coffee table, and fold blankets neatly.
Open a window for ventilation when appropriate and safe to do so.
Your lounge should now feel cleaner, fresher, and more organized.
Best Tips
Always read the care label on upholstered furniture before applying homemade cleaning solutions. The label can tell you whether the material is suitable for water-based cleaning, solvent-based cleaning, or professional cleaning only.
When cleaning wood furniture, less moisture is better. Use a slightly damp microfiber cloth and dry the surface promptly rather than saturating the finish.
Clean from top to bottom. Dust shelves and elevated surfaces before vacuuming the floor so falling particles can be removed during the final vacuuming stage.
Don’t underestimate the importance of vacuum attachments. Crevice tools are particularly useful for sofa seams, underneath cushions, and narrow spaces where crumbs accumulate.
Avoid mixing different commercial cleaning products together. More products do not necessarily mean better cleaning and can create unwanted chemical reactions.
For stubborn stains, identify the type of stain and the upholstery material before choosing a treatment rather than repeatedly applying stronger chemicals.
Best Ingredient Options
🧴 White Vinegar
White vinegar can be useful for some household cleaning tasks when properly diluted, but it isn’t suitable for every material. Keep it away from natural stone and surfaces that are sensitive to acids.
🫧 Mild Dish Soap
A small quantity of mild dish soap diluted in water can be useful for certain washable surfaces and fabrics. Avoid using too much because soap residue can attract dirt.
🧂 Baking Soda
Baking soda is primarily useful here as a dry deodorizing powder for compatible upholstery. Always vacuum it thoroughly afterward.
💧 Warm Water
Comfortably warm water can help dissolve ordinary grime, but very hot water isn’t necessary and may damage certain fabrics or finishes.
🧽 Microfiber Cloths
High-quality microfiber cloths are excellent for everyday dusting and wiping because they are soft and reusable.
Recipe Variations
Pet-Friendly Lounge Refresh
If your sofa frequently encounters pet messes, consider using a commercially formulated enzymatic cleaner designed specifically for the affected upholstery.
These products are formulated for particular organic stains and odors and should be used according to their labels.
Sensitive-Fabric Version
For delicate upholstery, skip homemade solutions and use the cleaning method recommended by the furniture manufacturer.
Some fabrics should only receive professional upholstery cleaning.
Quick 15-Minute Refresh
When you don’t have time for a full deep clean, focus on removing clutter, vacuuming the sofa, wiping high-touch surfaces, and vacuuming the visible floor area.
This provides a fast visual improvement without attempting a complete cleaning session.
Seasonal Deep Clean
For a more extensive home refresh, add curtains, lampshades, baseboards, windows, sofa legs, cabinet interiors, and hard-to-reach areas to your cleaning checklist.
What to Pair With
A freshly cleaned lounge pairs beautifully with a simple home organization routine.
Add freshly washed throw blankets, neatly arranged cushions, clean curtains, and a decluttered coffee table for a complete living-room refresh.
You can also finish with a naturally ventilated room rather than relying heavily on artificial fragrances. A clean room doesn’t need to be strongly scented to feel fresh.
Make-Ahead Instructions
The cleaning solution can be prepared shortly before cleaning.
For convenience, you can also organize your microfiber cloths, vacuum attachments, gloves, and cleaning products in a small cleaning caddy before beginning.
Avoid preparing large quantities of homemade cleaning mixtures for long-term storage. Freshly prepared diluted solutions are generally preferable.
Storage
Store cleaning products securely in their original labeled containers whenever possible.
Keep homemade mixtures clearly labeled and away from children and pets.
Do not store vinegar-based solutions in containers that previously held food unless they are thoroughly cleaned and permanently designated for cleaning use.
Reheating
This cleaning routine doesn’t require reheating.
If your solution becomes cold while cleaning, there is generally no need to warm it again. Room-temperature water is perfectly adequate for most everyday cleaning tasks.
Freezing
Freezing is not recommended for the cleaning solution.
Instead, prepare only the quantity you expect to use during your cleaning session.
Common Mistakes to Avoid
Using Too Much Cleaning Solution
More product doesn’t automatically mean cleaner furniture. Excess moisture can leave residue and may damage upholstery, wood, or flooring.
Scrubbing Stains Aggressively
Hard scrubbing can spread stains and damage delicate fibers. Gentle blotting is usually a better starting technique.
Using Vinegar on Everything
Vinegar is useful for some cleaning jobs but can damage natural stone, certain wood finishes, and other acid-sensitive surfaces.
Applying Baking Soda Paste to Wood
Baking soda can be mildly abrasive. Using it as a paste on finished wood may scratch or dull some surfaces.
Skipping the Spot Test
Never assume that a homemade cleaner is safe simply because its ingredients are common household products.
Cleaning Before Vacuuming
Dust, crumbs, and hair should generally be removed before introducing moisture. Otherwise, dirt can become stuck to damp surfaces.
Leaving Furniture Wet
Excess moisture can contribute to unpleasant odors and damage some furniture materials. Use minimal liquid and provide adequate ventilation and drying time.
Nutrition Estimate
Because this is a DIY home cleaning routine rather than a food recipe, nutritional values are not applicable.
| Nutrition | Estimate |
| Calories | Not applicable |
| Protein | Not applicable |
| Carbohydrates | Not applicable |
| Fat | Not applicable |
| Fiber | Not applicable |
| Sugar | Not applicable |
Frequently Asked Questions
Can I use vinegar on my wooden coffee table?
Not automatically. Vinegar can damage or dull certain wood finishes. Check the manufacturer’s recommendations first and use a wood-safe cleaner for finished furniture.
Can I use baking soda on my sofa?
It may be suitable for some upholstery as a dry deodorizer, but always check the furniture manufacturer’s care instructions first.
How often should I deep clean my living room?
A quick cleaning can be done weekly, while a more thorough lounge refresh can be performed every few weeks or according to how quickly dust, dirt, and clutter accumulate.
How can I remove odors from a sofa?
Start with thorough vacuuming and ventilation. For compatible upholstery, baking soda may help with everyday odors. Persistent odors or stains may require an upholstery-specific cleaner or professional cleaning.
Can I use the same cleaner on every surface?
No. Different materials require different cleaning methods. Wood, natural stone, glass, painted surfaces, upholstery, and flooring should be cleaned with products appropriate for each material.
How do I clean a sofa without damaging it?
Check the care label, vacuum thoroughly, spot-test any cleaner, use minimal moisture, blot rather than scrub, and allow the upholstery to dry completely.
Final Thoughts
A professional-looking lounge doesn’t require expensive equipment or hours of exhausting scrubbing. The most effective approach is simply to declutter, vacuum thoroughly, choose material-appropriate cleaners, spot-test first, and work systematically.
With a few basic supplies and the right technique, this DIY deep cleaning lounge refresh can help transform a dusty, cluttered living room into a noticeably cleaner and more comfortable space.
⚠️ Important: Cleaning products should always be used according to their labels and the manufacturer’s care instructions for your furniture and surfaces. Never mix bleach with vinegar, ammonia, or other incompatible cleaning products.