Introduction
Dirty bathroom tiles and grout can quickly make an otherwise clean bathroom look dull and neglected.
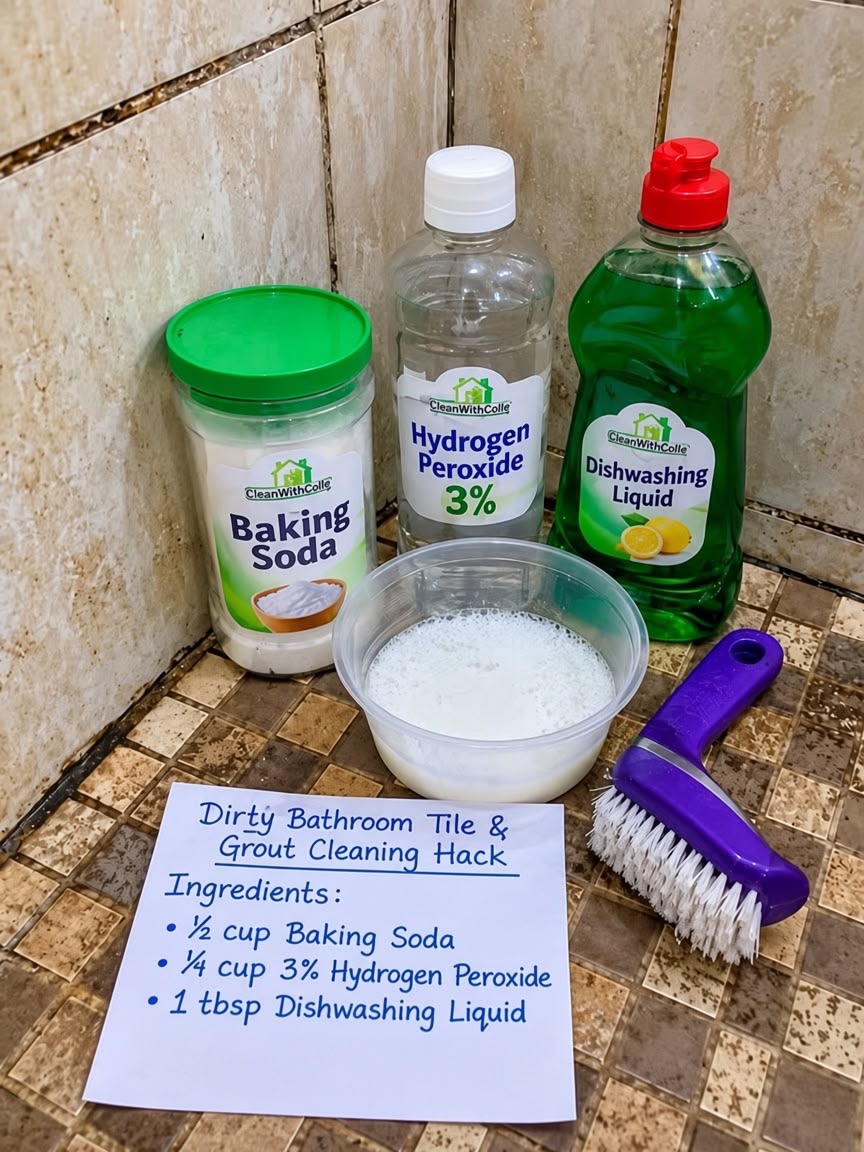
This simple homemade cleaning paste combines baking soda, 3% hydrogen peroxide, and dishwashing liquid to help loosen everyday grime and residue from suitable tile and grout surfaces.
It is easy to prepare, inexpensive, and requires only a few basic household supplies.
Cleaning Recipe Overview
| Detail | Information |
| Prep Time | 5 minutes |
| Application Time | 5 minutes |
| Dwell Time | 5–10 minutes |
| Scrubbing Time | 10–15 minutes |
| Total Time | About 20–30 minutes |
| Difficulty | Easy |
| Best For | Suitable bathroom tile and grout |
Ingredients & Supplies
| Ingredient / Supply | Quantity |
| Baking soda | 1/2 cup |
| 3% hydrogen peroxide | 1/4 cup |
| Dishwashing liquid | 1 tablespoon |
| Scrub brush | 1 |
| Mixing bowl | 1 |
| Clean sponge or cloth | 1 |
| Household cleaning gloves | Recommended |
Step-by-Step Instructions
Prepare the Cleaning Paste
Add the baking soda to a clean mixing bowl.
Slowly pour in the 3% hydrogen peroxide.
Add the dishwashing liquid.
Stir everything together until you have a smooth, spreadable paste.
The mixture should be thick enough to stay where you apply it without running excessively.
Prepare the Bathroom Surface
Remove toiletries and other objects from the area you plan to clean.
Quickly wipe or sweep the surface to remove loose dust, hair, and debris.
Open a window or turn on the bathroom ventilation fan if possible.
Apply the Cleaner
Using a small brush, sponge, or gloved hand, apply a thin layer of the paste directly onto dirty grout lines.
You can also apply it to suitable tile surfaces where soap residue or grime has accumulated.
Concentrate on visibly dirty areas rather than coating the entire bathroom unnecessarily.
Let It Sit
Allow the mixture to sit for approximately 5–10 minutes.
Do not allow the paste to completely dry onto the surface.
For a new or delicate surface, test the mixture on a small, inconspicuous area first.
Scrub the Grout
Use a sturdy grout brush or small scrub brush.
Work along the grout lines using moderate pressure and small back-and-forth movements.
Pay extra attention to areas with stubborn buildup.
Avoid excessively aggressive scrubbing, especially if the grout is old, cracked, or deteriorating.
Rinse Thoroughly
Rinse the cleaned area generously with clean water.
Use a damp sponge or microfiber cloth to remove any remaining paste.
Repeat the rinse if necessary.
Finally, wipe the tiles dry with a clean cloth.
Best Tips for Better Results
Work in small sections: This makes the cleaning process easier to control.
Use a grout brush: Its narrow shape makes it easier to reach recessed grout lines.
Don’t let the paste dry: Dried residue can be more difficult to remove.
Rinse thoroughly: Baking soda and dish soap can leave a film if they aren’t completely removed.
Test first: Always test homemade cleaners on a small hidden area before treating a large surface.
For Heavily Soiled Grout
For particularly dirty grout, apply a thin layer of the paste and allow it to sit for several minutes.
Scrub gently with a grout brush.
If necessary, repeat the process rather than applying excessive pressure.
Multiple gentle cleaning sessions are preferable to aggressively scrubbing delicate or damaged grout.
Suitable Surfaces
This cleaning method is intended primarily for compatible, durable bathroom tile and grout surfaces.
Use extra caution with:
- Marble
- Limestone
- Natural stone
- Porous surfaces
- Polished stone
- Sealed or specialty surfaces
Always check the manufacturer’s care instructions before using a homemade cleaner on these materials.
Important Safety Precautions ⚠️
Use only 3% hydrogen peroxide for this household cleaning method.
Wear gloves and avoid getting the mixture in your eyes.
Never mix this cleaner with bleach, ammonia, vinegar, or other household cleaning products.
Do not store the homemade mixture in a sealed container.
Keep hydrogen peroxide, dishwashing liquid, and the prepared mixture away from children and pets.
Good ventilation is recommended while cleaning.
Common Mistakes to Avoid
Using Concentrated Hydrogen Peroxide
Do not substitute a stronger concentration simply because you think it will clean better.
Use 3% hydrogen peroxide as specified.
Mixing Cleaning Products
Never add bleach, ammonia, vinegar, or another cleaning chemical to this mixture.
Combining household cleaning products can create dangerous chemical reactions.
Using a Metal Brush
A metal brush can scratch certain tiles and damage grout.
Use a suitable nylon or grout-cleaning brush instead.
Leaving the Paste on Too Long
The paste should not be allowed to dry completely.
A short dwell time followed by thorough scrubbing and rinsing is preferable.
Skipping the Final Rinse
Always rinse the surface thoroughly after cleaning to remove the loosened grime and remaining cleaning solution.
How Often Should You Clean Bathroom Grout?
Regular cleaning can help prevent soap residue and everyday grime from accumulating.
For routine bathroom maintenance, wipe down wet surfaces regularly and allow the bathroom to dry properly after showers.
Good ventilation can also help reduce persistent moisture.
Frequently Asked Questions
Can I use this cleaner on marble?
It is better to avoid using homemade cleaners on marble or other sensitive natural stone unless the manufacturer’s care instructions specifically allow the ingredients.
Can I substitute another product for hydrogen peroxide?
You can, but the cleaning method and results will be different.
Do not substitute vinegar or bleach, and never combine them with this recipe.
How long should the cleaner sit?
Start with approximately 5–10 minutes.
Do not allow the mixture to dry completely on the surface.
Do I need to rinse the bathroom tiles afterward?
Yes. Thorough rinsing is important to remove the cleaning paste and loosened dirt.
Can I use this on every type of grout?
No. Grout materials and sealants vary. Always check the manufacturer’s recommendations and test an inconspicuous area first.
Can I use this cleaner on shower walls?
It may be suitable for some durable tile and grout surfaces, but always test first and rinse thoroughly.
Final Thoughts
This DIY bathroom tile and grout cleaning paste is a simple option for tackling everyday grime on appropriate surfaces.
The combination of baking soda, 3% hydrogen peroxide, and dishwashing liquid creates an easy-to-apply paste that can be followed by gentle scrubbing and thorough rinsing.
For the best results, work in small sections, use an appropriate brush, test the surface first, and never mix this cleaner with bleach, ammonia, vinegar, or other cleaning chemicals.