Introduction
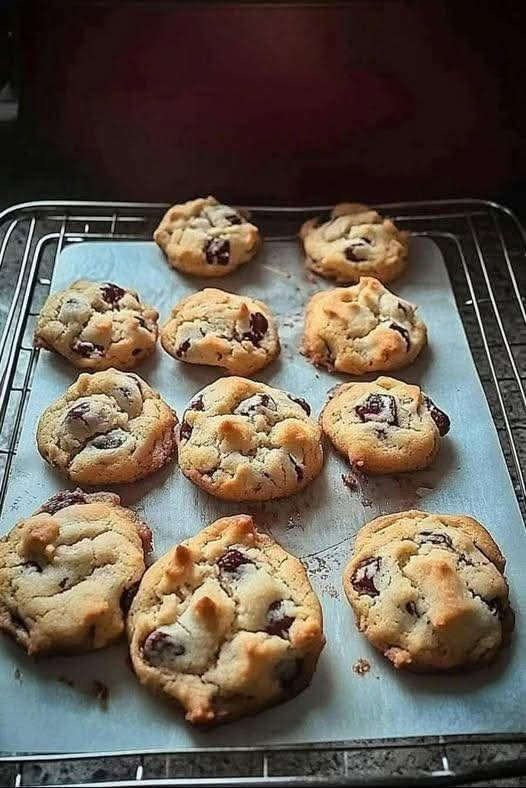
Neighbor Judy’s chocolate chip cookies are a classic treat that never fails to bring joy to anyone who tries them.
This beloved recipe has been passed down and is known for its perfect balance of sweetness and a soft, chewy texture.
With simple ingredients and easy steps, it’s a go-to for any occasion, whether you’re baking for a special event or just craving something sweet.
The rich flavor comes from the combination of brown sugar and butter, which creates a deeply satisfying base for the semi-sweet chocolate chips that melt perfectly into each bite.
These cookies are not only delicious but also incredibly easy to make, making them an ideal choice for bakers of all skill levels.
Ingredients
1 stick of butter, softened (salted butter works best)
2 cups of light brown sugar
2 eggs
1 1/2 teaspoons of vanilla extract
2 1/2 cups of all-purpose flour
1 teaspoon of baking soda
1/2 teaspoon of sea salt
1 bag of semi-sweet chocolate chips
Instructions
To begin, cream together the butter and light brown sugar in a large mixing bowl. Using an electric mixer or whisk, mix until the ingredients are smooth and light.
Add the eggs and vanilla extract into the bowl, continuing to mix until everything is well combined.
Next, combine the dry ingredients. In a separate bowl, whisk together the flour, baking soda, and sea salt.
Gradually add the dry mixture to the wet ingredients, stirring until the dough begins to form. Be sure to scrape the sides of the bowl to ensure all the ingredients are fully incorporated.
Once your dough is mixed, add the semi-sweet chocolate chips to the bowl. Fold them in evenly, ensuring that each cookie will have a generous amount of chocolate.
For shaping the cookies, use a teaspoon to scoop the dough onto a baking sheet. You can make them larger or smaller based on your personal preference.
Leave enough space between the dough balls to allow them to spread while baking.
Preheat your oven to 350°F (175°C) and bake the cookies for 8 to 9 minutes. Keep a close eye on them, and take them out when the tops are slightly golden brown.
They will continue to cook as they cool on the baking sheet, giving them the perfect texture.
Once out of the oven, let the cookies sit on the baking sheet for a few minutes before transferring.
them to a wire rack to cool completely. This helps them firm up without losing their soft, chewy quality.
How to Make
Making these cookies is a simple process that can be done in just a few easy steps. First, ensure that your butter is softened, as this will help it cream more easily with the sugar.
Using a hand mixer or stand mixer makes the process even smoother, but you can also do it by hand with a wooden spoon or whisk if needed.
When it comes to the dry ingredients, it’s important to measure the flour correctly to avoid dense cookies.
Stir the flour before measuring, and then spoon it into the measuring cup for accuracy.
Don’t forget to sift the baking soda and sea salt into the flour to ensure they are evenly distributed throughout the dough.
The key to making perfectly shaped cookies is in the way you scoop the dough. Use a teaspoon or small cookie scoop for evenly sized cookies.
If you prefer larger cookies, simply use a tablespoon or even a larger scoop. Just remember to adjust the baking time slightly to accommodate the larger size.
For best results, always check the cookies as they bake, as oven temperatures can vary. You want the edges to be set and slightly golden.
while the centers should still look a little soft. This will give you a perfect, chewy cookie with a slightly crisp exterior.
Once the cookies are out of the oven, resist the temptation to move them too quickly. Let them cool on the sheet for a few minutes before transferring them to a cooling rack.
This will prevent them from breaking apart while they firm up.
If you have leftovers, these cookies store well in an airtight container for up to a week, or you can freeze them for longer storage. Just make sure to separate the cookies with parchment paper if stacking them in a container.
To get creative, feel free to add nuts, dried fruit, or other mix-ins to the dough before baking. This allows you to experiment with different flavors and textures.
Variations
While Judy’s chocolate chip cookies are delicious as they are, you can always add your own twist to the recipe. One simple variation is to switch up the type of chocolate chips you use. Dark chocolate.
milk chocolate, or even white chocolate chips can create a different flavor profile, depending on your preference.
For a more indulgent treat, try adding a mix of chocolate chips and chopped chocolate bars. The chunks will melt in pockets, creating gooey, irresistible bites throughout the cookies.
If you’re a fan of nuts, adding a cup of chopped walnuts or pecans to the dough will give the cookies a satisfying crunch and enhance the flavor with a nutty richness.
You can toast the nuts lightly for even more flavor before adding them to the dough.
For a fun twist, consider adding a pinch of cinnamon to the dry ingredients for a warm, spiced undertone that pairs wonderfully with the sweetness of the brown sugar and chocolate chips.
Another variation involves swapping out the vanilla extract for almond extract, which gives the cookies a unique, nutty flavor that complements the chocolate chips beautifully.
If you’re looking for a more festive cookie, you can mix in a handful of colorful sprinkles or even small candies, like M&Ms, for a fun and vibrant twist on the classic chocolate chip cookie.
For those who prefer a healthier version, you can experiment by using whole wheat flour or a gluten-free flour blend.
You can also substitute coconut oil for the butter to make a dairy-free cookie, though the texture may differ slightly.
Tips
One of the most important tips for perfect cookies is to ensure that your butter is properly softened. If your butter is too cold, it won’t cream as easily with the sugar.
resulting in a denser dough. If it’s too melted, it can lead to cookies that spread too much while baking. Aim for butter that’s soft but not overly greasy.
Don’t overmix your dough once you’ve added the dry ingredients. Stir just until everything is combined to avoid tough cookies.
Overmixing the dough will activate the gluten, leading to a chewier, denser texture rather than the light, soft cookies we love.
Make sure to space your cookies out properly on the baking sheet. If they are too close together, they will spread and merge into each other during baking.
Leave about 2 inches of space between each scoop of dough to give them room to grow.
If you’re making larger cookies, be aware that they may require a slightly longer bake time.
Check them after about 10 minutes, and if they are still soft in the center, give them a few more minutes to firm up.
To prevent cookies from getting too hard after cooling, store them in an airtight container with a slice of bread. The bread will absorb any moisture and help keep the cookies soft for longer.
You can also chill the cookie dough in the refrigerator for about an hour before baking. This helps the flavors develop more fully and prevents the cookies from spreading too much when they bake.
For an extra touch of flavor, consider sprinkling a tiny bit of sea salt on top of each cookie before baking. The salty-sweet contrast is a delightful touch that elevates the overall taste.
Conclusion
Neighbor Judy’s chocolate chip cookies are a timeless classic that can be enjoyed by anyone, whether they are baking for the first time or are seasoned pros.
Their chewy texture and rich chocolate flavor make them a go-to recipe for any occasion.
With a few simple ingredients and some helpful tips, you’ll be able to bake the perfect batch every time.
Don’t forget to experiment with variations to make the recipe your own and enjoy the delicious results!