Introduction:
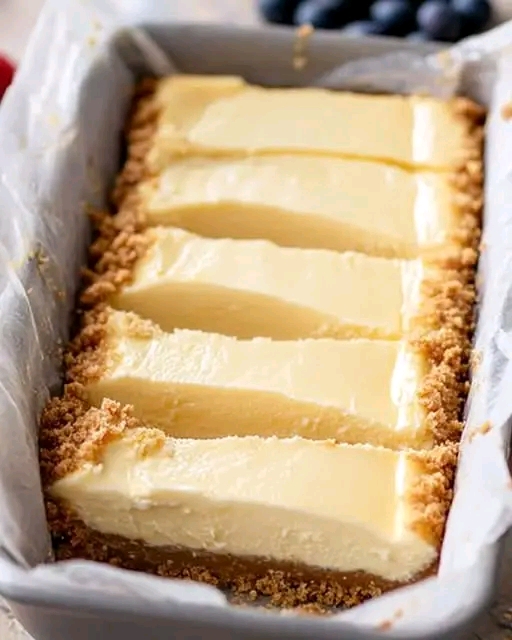
Cheesecake is a beloved dessert that combines the rich, creamy texture of cream cheese with a sweet, buttery crust. This Basic Loaf Pan Cheesecake recipe is an easy and delicious.
way to enjoy cheesecake at home without the need for a springform pan. Whether you’re new to baking or a seasoned pro.
this simple recipe will guide you through creating a delectable treat that’s perfect for any occasion.
The best part? It’s made with easy-to-find ingredients and doesn’t require a water bath or complicated techniques.
Ingredients:
For the crust:
3/4 cup graham cracker crumbs (about 6 crackers)
2 tablespoons granulated sugar
3 tablespoons unsalted butter, melted
For the filling:
8 ounces cream cheese, softened
1/3 cup granulated sugar
1 large egg
1 teaspoon vanilla extract
2 tablespoons sour cream
1 tablespoon all-purpose flour
Instructions:
Start by preheating your oven to 325°F (163°C). This ensures the oven is at the right temperature when you’re ready to bake.
Next, prepare the crust by combining the graham cracker crumbs, granulated sugar, and melted butter in a small bowl.
Stir until the mixture is well-combined and forms a crumbly texture. Press this mixture into the bottom of a loaf pan to form an even, compact crust. Use the back of a spoon to press it down firmly.
Place the loaf pan in the preheated oven and bake for 10 minutes. This step helps to set the crust before adding the filling, ensuring it holds together once the cheesecake is baked. After baking, remove the crust from the oven and let it cool while you prepare the filling.
For the filling, beat the softened cream cheese and granulated sugar together in a mixing bowl using an electric mixer.
Continue beating until the mixture is smooth and creamy, with no lumps remaining. This will take about 2-3 minutes.
Add the egg, vanilla extract, sour cream, and all-purpose flour to the mixture, and beat until everything is fully incorporated.
The batter should be smooth and slightly thick, ready to be poured onto the cooled crust.
Pour the cream cheese mixture over the prepared crust in the loaf pan. Smooth the top with a spatula to ensure an even layer.
Bake the cheesecake for 40-45 minutes, or until the edges are set, but the center is still slightly jiggly.
Once baked, remove the cheesecake from the oven and allow it to cool to room temperature. Once cooled.
refrigerate it for at least 3 hours, or preferably overnight, to let the flavors meld and the texture firm up.
How to Make:
To make the cheesecake, start by preparing the graham cracker crust. Crush the graham crackers.
into crumbs using a food processor or by placing them in a ziplock bag and crushing them with a rolling pin.
Add the granulated sugar and melted butter to the crumbs, then mix well. The butter helps bind the crumbs together, creating a sturdy crust.
Once the crust mixture is ready, press it firmly into the bottom of your loaf pan, ensuring it’s even and compact.
This will help the crust stay in place as it bakes. You can also use the back of a spoon to make sure the crumbs are well-packed into the pan.
After the crust is set, move on to preparing the filling. In a separate bowl, beat the cream cheese with the sugar until smooth.
The goal is to get rid of any lumps and make the cream cheese silky. This step is essential for achieving a smooth and creamy texture in the cheesecake.
When adding the egg, vanilla, sour cream, and flour, make sure everything is incorporated fully. The egg helps the filling set.
while the sour cream adds a slight tang to balance the richness of the cream cheese. The flour helps to thicken the mixture, ensuring a sturdy, sliceable cheesecake.
After the filling is ready, pour it over the cooled crust in the loaf pan. Use a spatula to spread the filling evenly across the top.
ensuring there are no gaps. The smooth texture of the filling will create a beautiful, creamy top once it’s baked.
Bake the cheesecake until it’s firm around the edges but still slightly wobbly in the center. The residual heat will help it set as it cools.
When it’s done, remove it from the oven and let it cool completely to room temperature.
Lastly, refrigerate the cheesecake for a few hours or overnight. Chilling the cheesecake is crucial to getting the perfect texture.
Once chilled, the cheesecake will be ready to serve, with a firm, creamy filling and a crisp, buttery crust.
Variations:
For a twist on the classic recipe, try adding fruit to the topping. Fresh berries, such as strawberries, blueberries, or raspberries, pair wonderfully with.
the creamy texture of the cheesecake. You can also drizzle fruit compote or a fruit sauce over the top for added sweetness and flavor.
If you’re a fan of chocolate, consider making a chocolate crust by replacing the graham crackers.
with crushed chocolate cookies. Alternatively, you can swirl melted chocolate into the cheesecake batter for a decadent chocolate-flavored filling.
For a more citrusy flavor, add a teaspoon of lemon or orange zest to the filling. This will give the cheesecake a refreshing, tangy note that contrasts nicely with the richness of the cream cheese.
To make the cheesecake even more indulgent, you can top it with whipped cream and a sprinkle of crushed nuts or toffee bits.
The crunch from the nuts or toffee adds a delightful contrast to the smooth texture of the cheesecake.
For a gluten-free version, use gluten-free graham crackers or other gluten-free cookies for the crust. Be sure to check that all your ingredients, including the flour, are certified gluten-free.
If you want to make a mini version of this cheesecake, you can divide the recipe into individual mini loaf pans or muffin tins.
This way, each serving will be perfectly portioned and ready to serve.
Finally, experiment with different extracts for the filling. Almond extract or coconut.
extract can be used instead of vanilla for a unique flavor profile. These small adjustments can give your cheesecake a distinctive twist.
Tips:
Make sure your cream cheese is softened before mixing it. This will help it blend more easily and result in a smoother filling without lumps.
If your cream cheese is too cold, it can lead to a lumpy texture that’s hard to smooth out.
When preparing the crust, don’t skip the step of pressing it firmly into the pan. A well-packed crust will prevent it from.
crumbling when you slice the cheesecake. Using the back of a spoon can help you pack it tightly.
If you don’t have a loaf pan, you can use a 9-inch square pan or a round cake pan.
Just be mindful of the cooking time, as the cheesecake may bake slightly differently depending on the pan you use.
It’s important to allow the cheesecake to cool to room temperature before refrigerating it. This will help prevent condensation from forming on the surface, which can affect the texture of the cheesecake.
If you’re making this cheesecake ahead of time, it can be stored in the refrigerator for up to 3-4 days. Just be sure to cover it tightly with plastic wrap or aluminum foil to keep it fresh.
For an extra creamy texture, you can add an extra tablespoon of sour cream to the filling. This will add a subtle tang and increase the creaminess of the cheesecake.
Before serving, let the cheesecake sit at room temperature for about 10 minutes. This will help soften the filling slightly, making it easier to slice and more flavorful.
Conclusion:
This Basic Loaf Pan Cheesecake is a simple, yet delicious dessert that anyone can make. With just a few basic ingredients and easy-to-follow instructions.
you’ll have a rich, creamy cheesecake that’s sure to please. Whether you enjoy it plain or with your favorite toppings, this cheesecake will quickly become a go-to treat for any occasion.
With endless variations and easy tips to follow, this cheesecake is versatile enough to suit different tastes and preferences.
Enjoy creating your own version and share it with friends and family—everyone will love this homemade dessert.