Introduction
A sourdough starter is the foundation of every great sourdough bread. It’s a mixture of flour, water, and naturally occurring wild yeast and bacteria that, over time, ferments and grows.
JBy nurturing this starter, you unlock the potential for a flavorful, tangy bread that is beloved by bakers and bread enthusiasts worldwide.
Making your own starter is not only rewarding, but it also adds a sense of authenticity and pride to your baking process.
Ingredients
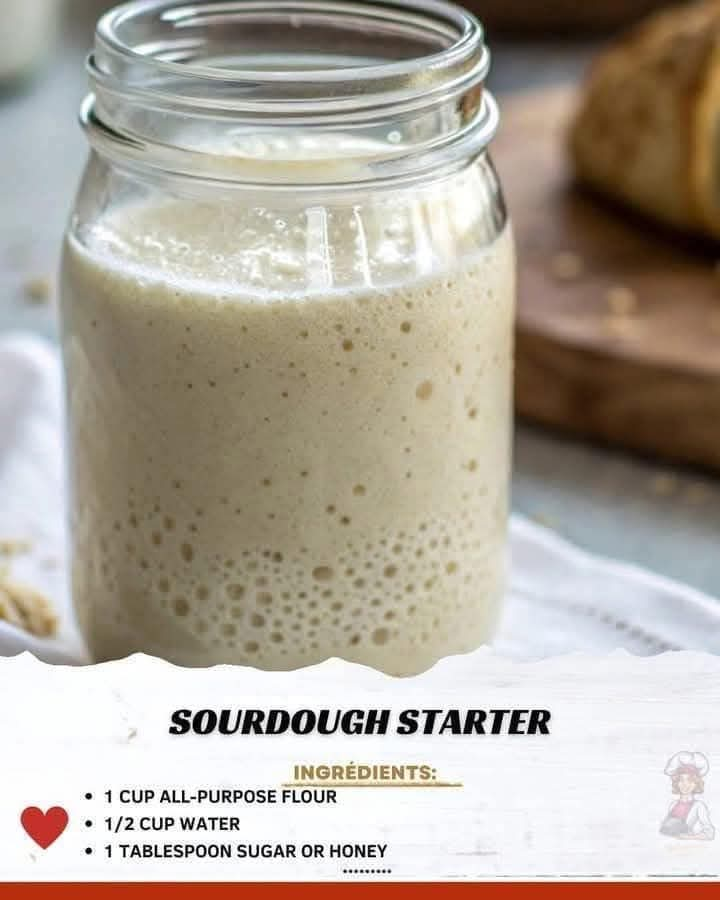
1 cup all-purpose flour
1/2 cup water
1 tablespoon sugar or honey
Instructions
To start your sourdough journey, mix the flour, water, and sugar or honey in a medium-sized glass or plastic container.
Stir until well combined, making sure there are no lumps of flour left. It’s important to use non-reactive containers.
such as glass or plastic, to prevent any interaction with the natural bacteria and yeast that will form.
After mixing, cover the container loosely with a lid or a clean cloth. This allows air to flow in, which is crucial for the wild yeast to grow and populate your mixture.
Keep the starter in a warm, quiet spot in your kitchen, away from drafts. A temperature between 70°F and 75°F is ideal for the fermentation process to begin.
For the first few days, you’ll need to feed your starter daily. To do this, discard half of the mixture (about 1/2 cup) and add another 1/2 cup of flour and 1/4 cup of water.
Stir well to combine and cover again loosely. This daily feeding encourages the wild yeast and bacteria to multiply, developing the sourdough flavor.
After 3-4 days, you should start to notice small bubbles forming in the mixture, and it will have a slightly tangy aroma. This is a good sign that your starter is becoming active.
If you don’t see much activity yet, don’t worry—it may take a bit longer for the yeast to establish itself, especially in cooler environments.
Continue the feeding process daily, always discarding half of the starter before adding the new flour and water.
As the days go on, the starter will become more bubbly and will double in size between feedings. You may also notice a stronger sour smell, which is a good sign of the lactic acid bacteria at work.
Around day 5-7, your starter should be bubbly, strong, and ready for baking. To test its readiness.
drop a spoonful of the starter into a glass of water. If it floats, it’s time to use it in your bread recipe.
Once your starter is active, you can keep it going by continuing to feed it regularly. If you don’t plan to bake right away.
you can store it in the fridge and feed it once a week. Before using it for baking, make sure to bring it to room temperature and feed it at least once to reactivate it.
How to Make
Making a sourdough starter is not just about the right ingredients but also the right environment. It’s essential to start with good-quality flour, as this will provide the nutrients that the wild yeast need to thrive.
Most bakers recommend using all-purpose flour for the first few days, as it has a good balance of starches and proteins for the yeast to feed on. Once your starter is established.
You can experiment with whole wheat or rye flour, which can introduce more flavor and speed up fermentation due to their higher nutrient content.
The water you use should be chlorine-free, as chlorine can kill the beneficial bacteria and yeast you’re trying to cultivate.
If your tap water is chlorinated, try using filtered or bottled water to help your starter thrive. The consistency of your starter should be similar to a thick pancake batter—smooth but not too runny.
Once you have your starter in a warm environment, it’s important to be patient. Wild yeast doesn’t work on a fixed schedule, so it can take anywhere from 3 to 7 days.
for your starter to become fully active. It’s crucial to resist the urge to rush the process. Allow.
the yeast and bacteria to grow at their own pace, and you’ll be rewarded with a beautiful, active starter.
While the starter needs a warm environment to grow, it should not be kept in direct sunlight or a place that’s too hot, as this can cause the mixture to dry out or become too acidic.
A simple kitchen countertop works fine, but avoid places like above an oven or in an area that fluctuates too much in temperature. Stability is key.
If you’re in a rush, you can speed up the process by using whole wheat flour for the first couple of days. Whole wheat flour has more nutrients, which can encourage quicker yeast growth.
Additionally, adding a small amount of honey or sugar can help kick-start the fermentation process, giving the yeast a little extra food to work with.
Remember that every starter behaves a little differently. The amount of flour and water you need to add each day might vary depending on the temperature.
humidity, and type of flour used. If the starter seems too thick or too thin, adjust by adding a bit more water or flour until it reaches the desired consistency.
Variations
While the basic sourdough starter recipe is simple, there are several variations you can try to tweak the flavor and fermentation process.
One common variation is using rye flour instead of all-purpose flour. Rye flour contains more nutrients than regular white flour.
which can give your starter a stronger, faster-growing culture. This often results in a tangier flavor and a more robust starter.
Another variation is adding different types of sugar, such as maple syrup or fruit juice, to encourage wild yeast growth.
Honey can also be used, although it’s essential to use it sparingly, as it can be too sweet and overpower the starter’s natural flavors.
Experimenting with different sweeteners can help you find a balance that suits your taste.
For a gluten-free option, you can use gluten-free flours, such as brown rice flour or sorghum flour. However, gluten-free starters tend to be a bit more finicky.
so expect the process to take longer. Some bakers also add a little bit of commercial yeast to help the process along, although this isn’t necessary for a traditional wild yeast starter.
If you want a milder sourdough flavor, you can reduce the frequency of feedings or use a different flour blend that ferments slower. This can produce a less tangy.
more subtle sourdough flavor. Conversely, to make your starter more tangy, try extending the time between feedings or experimenting with higher-acid ingredients like whole wheat flour.
Many bakers also like to incorporate a mixture of both whole grain and white flour. The idea behind this variation is that whole grains provide a more nutrient-rich environment for the yeast.
while the white flour ensures a smooth consistency and structure in the starter. The balance between the two types of flour can give your starter a unique flavor.
For those looking to create a starter with specific flavors, like a fruity or nutty sourdough, adding ingredients such as mashed fruit,
like apples, or even a splash of vinegar, can alter the starter’s profile. These additions provide unique flavors that will come through in your final bread.
Finally, some bakers prefer to use a “discard” from an established starter to start a new batch. This method allows you to bypass.
the initial waiting period and start with a culture that’s already active and full of wild yeast, speeding up the process significantly.
Tips
One of the best tips when making a sourdough starter is to always feed it at the same time every day. Consistency is key to helping the yeast and bacteria grow steadily.
Marking the level of your starter with a rubber band or piece of tape will help you visually track its progress, showing how much it has expanded between feedings.
If your starter seems sluggish or isn’t growing as expected, try moving it to a slightly warmer spot in your kitchen.
Sometimes, a few degrees of temperature change can make all the difference. However, avoid letting the starter get too hot, as this can kill the yeast and bacteria.
Keep in mind that it’s okay if your starter smells sour or tangy—it’s a natural part of the fermentation process.
However, if it begins to smell off, like rotten or unpleasantly foul, it could be a sign of unwanted bacteria, and you may need to start over.
A healthy starter will smell yeasty, slightly tangy, and a bit like fresh dough.
Another tip is to use filtered or bottled water, especially if you live in an area with chlorinated tap water.
Chlorine can stunt the growth of the yeast in your starter, so using water that’s free from chemicals is essential for successful fermentation.
If you’re using your starter regularly for baking, you can store it in the fridge to slow down fermentation between feedings.
This is especially helpful if you don’t bake every day. However, remember to bring the starter to room temperature and feed it a couple of times before using it in a recipe.
A common challenge with sourdough starters is overfeeding. It’s tempting to keep adding flour and water, but if you don’t discard part of the starter.
it can become too large and unmanageable. Discarding half of the mixture before each feeding keeps your starter balanced and ensures that the yeast has enough food to thrive.
Lastly, if you’re new to sourdough, take notes on each batch of starter you create. This way, you can track what worked and what didn’t
making adjustments for future starters. Documenting the temperature, flour type, and feeding schedule can help you understand your starter’s behavior and improve over time.
Conclusion
Making a sourdough starter is a labor of love and patience, but the rewards are worth the effort. With just a few basic ingredients and a little care.
you can create a living culture that can be used to bake delicious bread, pancakes, and other baked goods for years to come.
The beauty of sourdough lies in its simplicity and the unique flavors that develop over time, making each batch special.
Whether you’re a seasoned baker or a novice, experimenting with a sourdough starter is an enriching experience.
So, gather your ingredients, take your time, and enjoy the process of creating something truly special from scratch.