Introduction
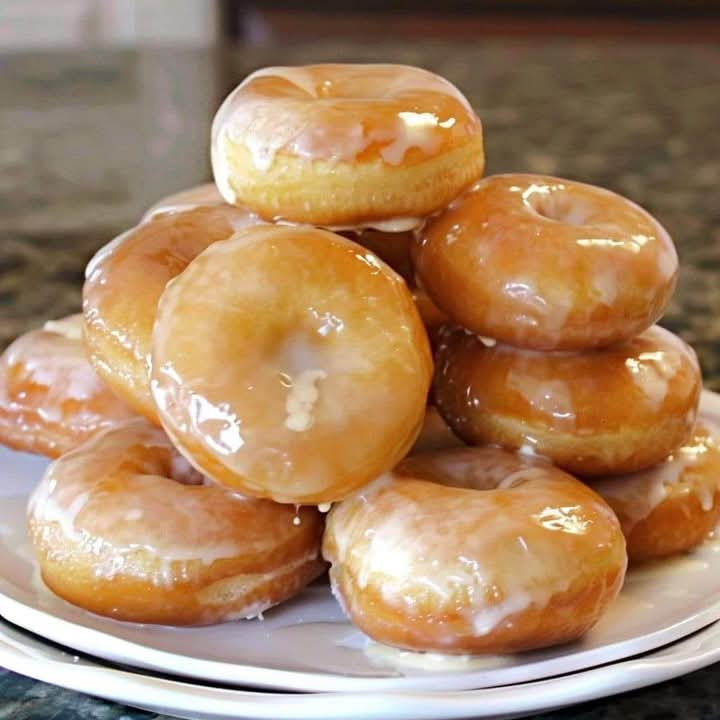
There’s something universally comforting about a freshly made glazed doughnut. With its light, fluffy texture and a sweet.
shiny glaze, it’s a treat that transcends age and occasion. Classic glazed doughnuts hold a timeless appeal, offering the perfect balance of simplicity and indulgence.
While store-bought doughnuts are convenient, making them at home elevates the experience. The process is not only rewarding.
but also allows you to customize flavors and ingredients to suit your preferences. Plus, nothing compares to the aroma of freshly fried dough wafting through your kitchen.
Whether you’re sharing them with loved ones or enjoying them as a solo indulgence, homemade glazed doughnuts bring joy with every bite.
Ingredients
All-purpose flour
Granulated sugar
Active dry yeast
Warm milk
Unsalted butter
Eggs
Salt
Vegetable oil for frying
Powdered sugar
Vanilla extract
Milk (for the glaze)
Instructions
Begin by activating the yeast. Dissolve the yeast in warm milk with a pinch of sugar and let it sit for a few minutes until it becomes frothy. This step ensures your doughnuts will rise properly.
In a mixing bowl, combine flour, sugar, and salt. Add the activated yeast mixture,eggs, and melted butter.
mix until a soft dough forms. Knead the dough on a floured surface until smooth and elastic.
Place the dough in a greased bowl, cover it with a clean towel, and let it rise in a warm place until it doubles in size. This step usually takes about an hour.
Once risen, punch down the dough and roll it out on a floured surface to about half an inch thick. Use a round cutter to cut out doughnut shapes, and use a smaller cutter to create the holes in the center.
Arrange the doughnuts on a lined baking sheet, cover them with a towel, and let them rise again until puffy. This second rise is essential for light and airy doughnuts.
Heat oil in a deep pan or fryer to the appropriate frying temperature. Carefully lower the doughnuts into the hot oil, cooking a few at a time until golden brown on both sides.
Remove the fried doughnuts with a slotted spoon and place them on a paper towel-lined plate to drain excess oil. Let them cool slightly before glazing.
How to Make
To make the glaze, whisk together powdered sugar, milk, and a splash of vanilla extract until smooth. Adjust the consistency by adding more milk for a thinner glaze or more sugar for a thicker one.
Dip each cooled doughnut into the glaze, allowing the excess to drip off. Place the glazed doughnuts on a wire rack to set. For extra sweetness, glaze them twice after the first layer sets.
Experiment with flavors by adding a touch of citrus zest, almond extract, or even melted chocolate to the glaze. These variations can add a unique twist to your doughnuts.
If you prefer a sugar-coated finish, skip the glaze and roll the warm doughnuts in granulated or powdered sugar for a classic alternative.
To ensure your doughnuts are evenly cooked, fry them in small batches and monitor the oil temperature closely. Overcrowding the pan can lead to uneven frying.
Keep leftover doughnut holes and fry them as a delightful mini treat. These bite-sized versions are perfect for snacking or dipping into extra glaze.
Store any leftover doughnuts in an airtight container for up to a day. For the best texture, warm them slightly in the microwave before serving.
Tips
Use a kitchen thermometer to maintain the correct frying temperature. Oil that’s too hot can burn the doughnuts, while oil that’s too cool may result in greasy doughnuts.
Knead the dough thoroughly to develop gluten, which contributes to the doughnuts’ soft and elastic texture. However, avoid over-kneading to keep them tender.
Choose a neutral oil like vegetable or canola oil for frying to ensure the doughnuts’ flavor shines through.
Make sure the doughnuts have risen sufficiently during both proofing stages. Proper rising ensures they’ll be light and fluffy after frying.
Prepare the glaze while the doughnuts are frying to ensure it’s ready for dipping as soon as the doughnuts are cool enough to handle.
For an extra touch, sprinkle toppings like crushed nuts, sprinkles, or coconut flakes onto the glaze before it sets. This adds texture and visual appeal.
If making doughnuts in advance, fry them fresh but prepare the glaze just before serving. This ensures they remain as fresh and delicious as possible.
Conclusion
Homemade glazed doughnuts are a delightful treat that captures the essence of comfort and indulgence. Their light, fluffy texture and sweet glaze make them a timeless favorite that’s hard to resist.
The process of making doughnuts from scratch may seem daunting, but it’s simpler than it appears and highly rewarding.
Each step, from kneading the dough to dipping them in glaze, is part of an enjoyable culinary adventure.
By customizing flavors, toppings, or even the shape, you can put your own spin on this classic recipe, making it a versatile addition to your baking repertoire.
Whether for breakfast, dessert, or a special occasion, they’re guaranteed to impress.
Sharing homemade doughnuts with loved ones adds a personal touch that store-bought versions simply can’t replicate. Their warm, fresh quality is sure to bring smiles and create lasting memories.
Celebrate the joy of baking and treat yourself to a batch of classic glazed doughnuts. They’re a delicious reminder of how simple pleasures can be the most satisfying.
